
How to create a Wix client portal in 2026 (easiest guide)
Turn your Wix site into a client portal
Assembly connects to your Wix site and gives clients a branded portal for projects, files, and billing. No manual role assignments required. Try for free!
4.9 rating
- 3 Ways to create a client portal in Wix in 2026
- Method 1: Wix Members Area app
- Method 2: Password-protected pages
- Method 3: Dedicated client portal software like Assembly
- Which method should you choose?
- Best practices for Wix client portals
- Ready to create a branded client experience? Try Assembly
- Frequently asked questions
If you're trying to give your clients a login area on Wix, you'll need to build a Wix client portal using the Members Area app or password pages. I'll show you how both methods work and when a dedicated platform makes more sense in 2026.
3 Ways to create a client portal in Wix in 2026
Wix wasn't built with client portals in mind, so the best approach depends on whether you need simple content sharing or full client relationship management. You can use the Members Area app for role-based access, password-protected pages for quick sharing, or connect a dedicated client portal platform like Assembly.
Let's discuss them in detail below:
Method 1: Wix Members Area app
The Members Area app allows you to create member-only pages on your Wix site. You can set up user accounts and control access to specific pages, often by configuring user roles or membership tiers alongside the app.
Note: The Members Area app is free to install on any Wix plan. You can create member accounts and member-only pages on free sites, but you'll need a Core or higher Business plan to accept payments for paid memberships.
Here's how to set up a client portal using the Members Area app:
1. Install the Members Area app
Open your site in the Wix Dashboard and in the left toolbar, click Apps > App Market.

In the App Market, search for "Members Area" and select Wix Members Area.

Click Add to Site and wait for it to install. Wix adds default member pages like login and My Account to your site, but you control whether they show in your site menu.
2. Add a login page
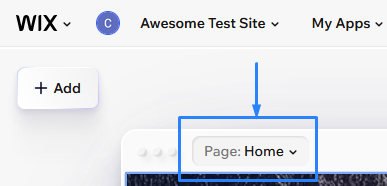
Click the page dropdown at the top of the Editor to open the Site Pages panel. This dropdown shows your current page name, which in this case is Page: Home.
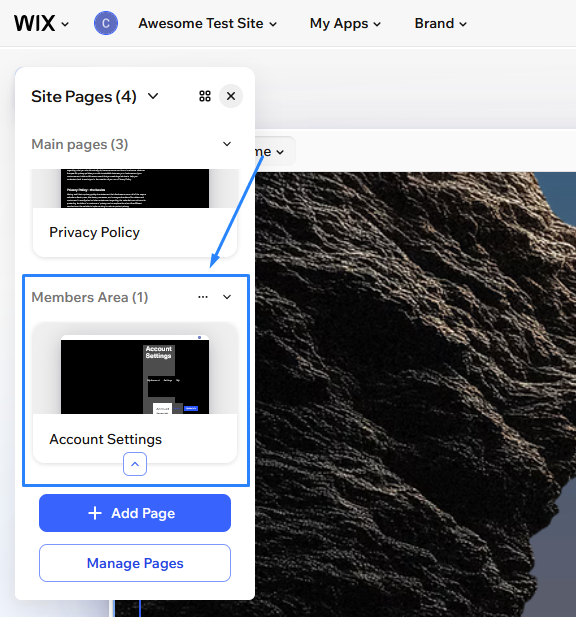
To manage which member pages appear on your site, navigate to one of the Members Area pages, like Account Settings.
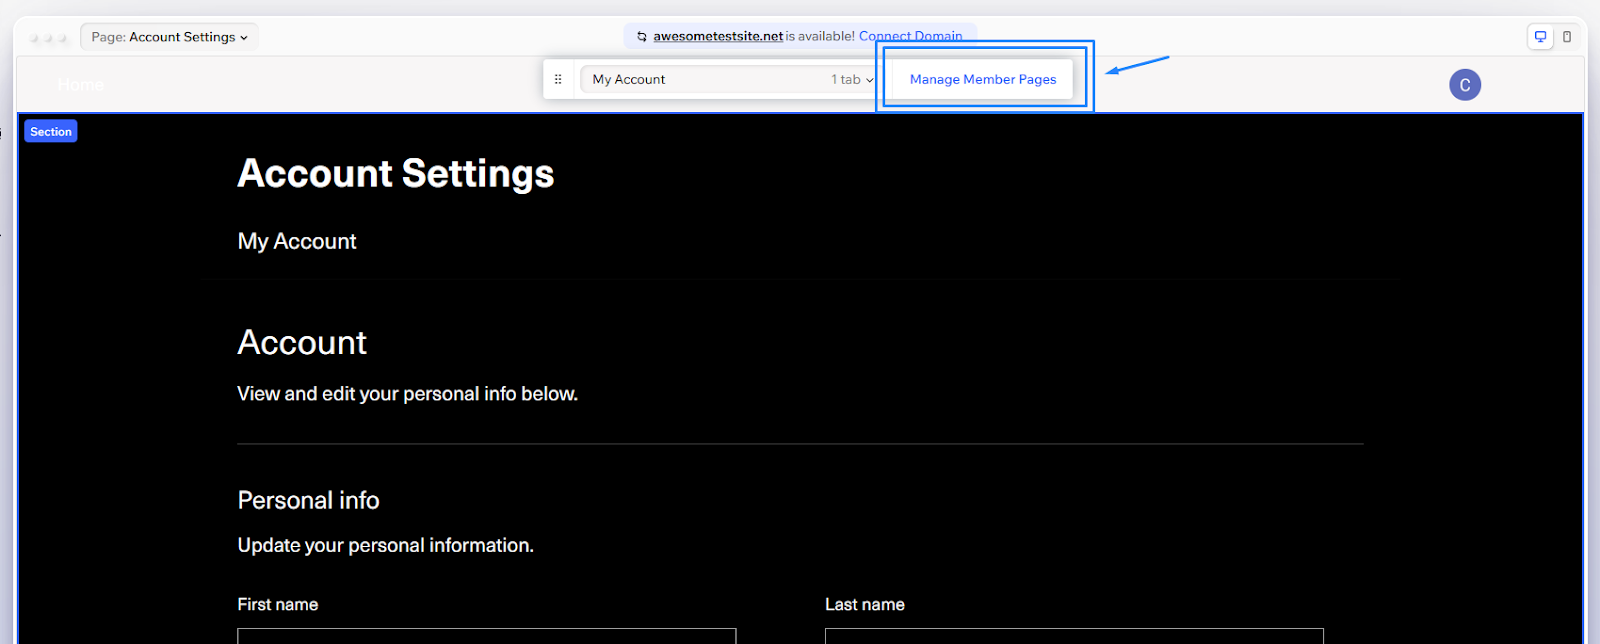
At the top of the page editor, you'll see a Manage Member Pages button. Click it to open the management panel, then click on All Pages. Add custom pages using the + Add Page button. This will bring you to your new empty page.
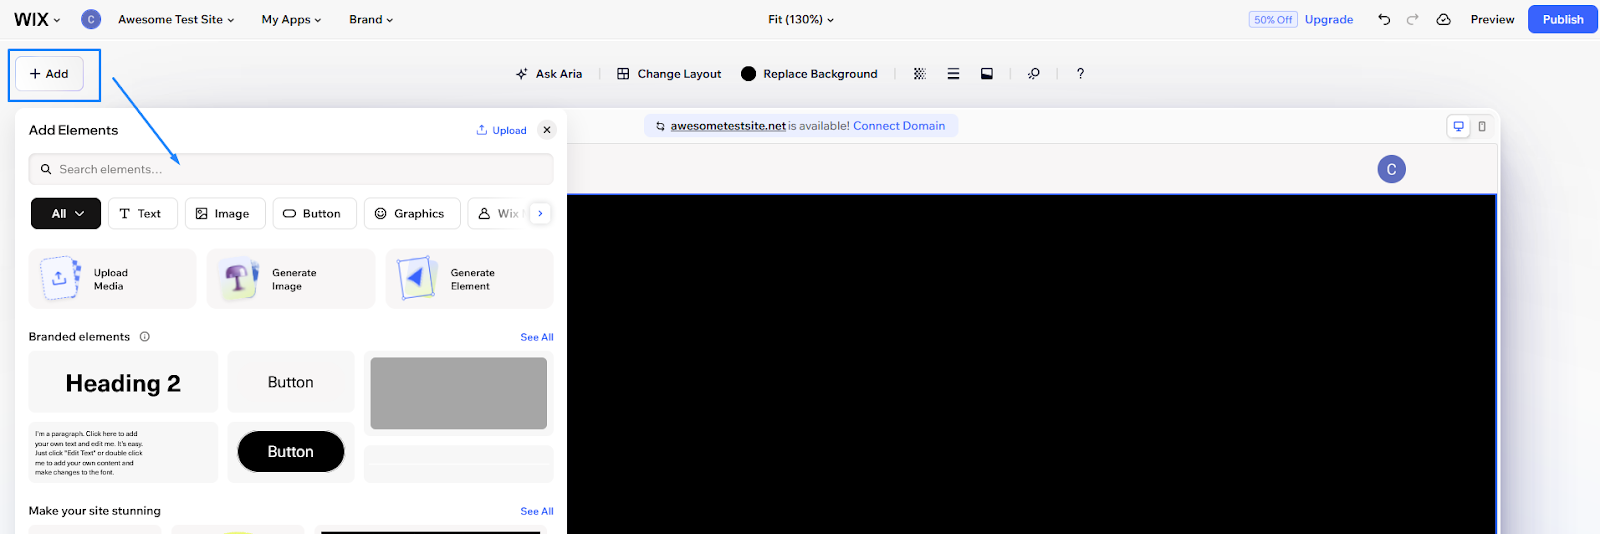
Click the + Add button on the top left of the screen, then navigate to the Wix Members Area section.
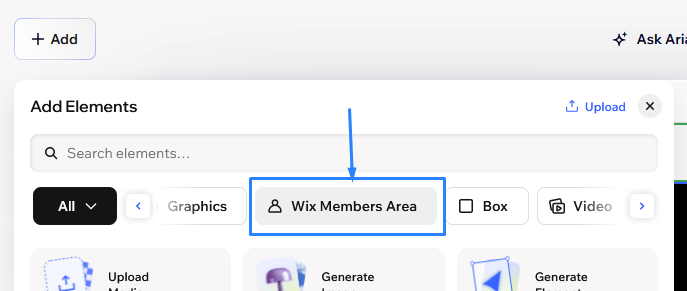
Drag the login bar element to your header or navigation area to create your login page.
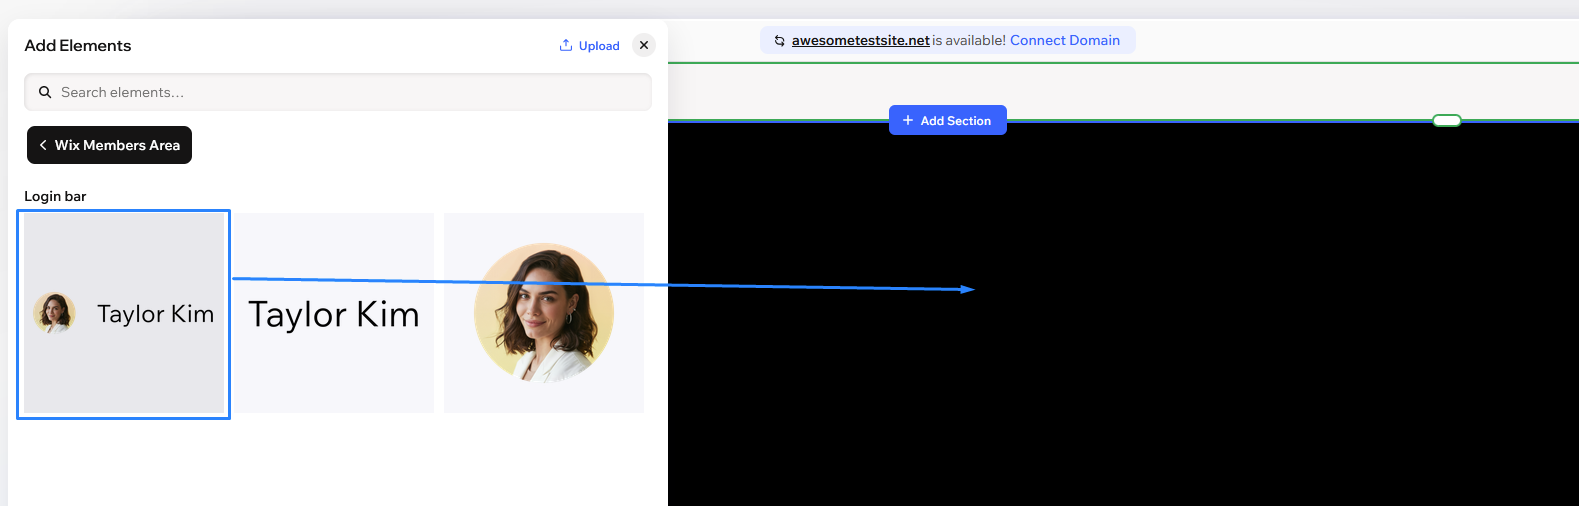
I recommend keeping the login button visible in your header or navigation menu so clients can easily find it. You can design the rest of this page however you prefer.
3. Create client content pages
In the Manage Member Pages panel (from step 2), click the + Add Page button under "Custom Member Page." This creates a new page that's already set up as a member page. Build out the content you want clients to see, like deliverables, reports, or project updates.
Tip: You can also create a normal page from the main Site Pages panel if you want to use a layout you've already designed, then restrict it to members later.
4. Restrict pages to members
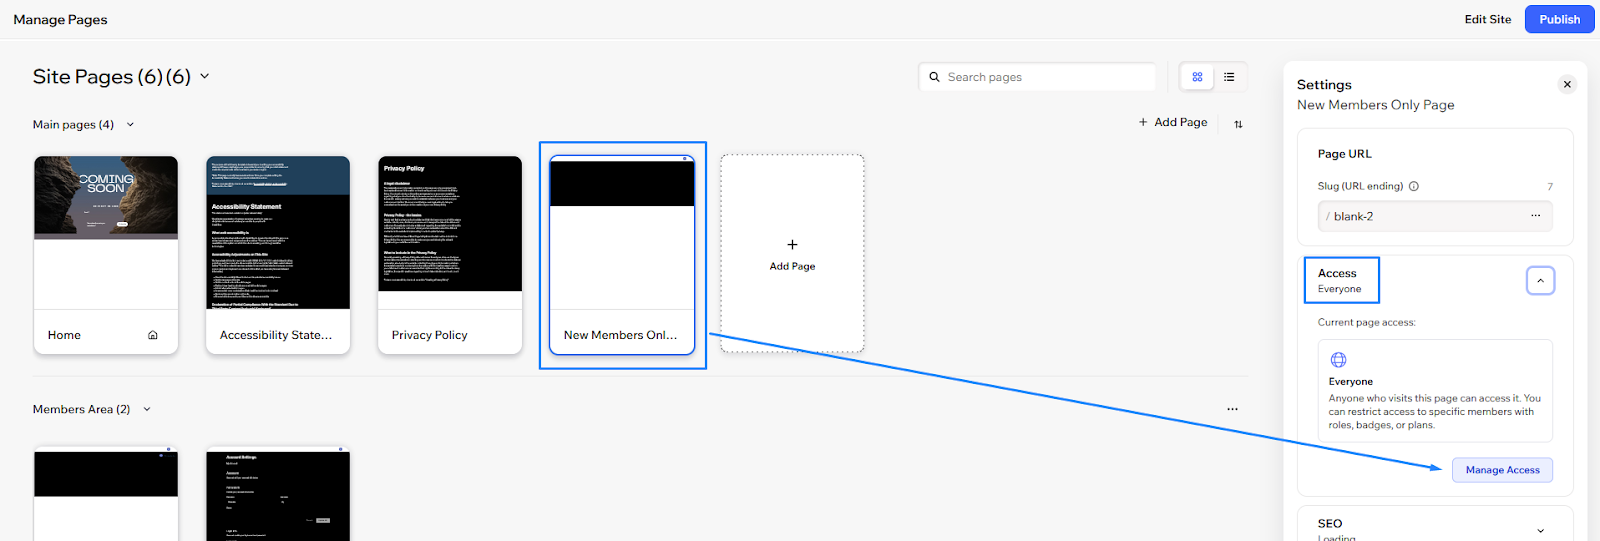
For any new or existing page, hover over the page name in the Pages panel and click the three-dot icon.

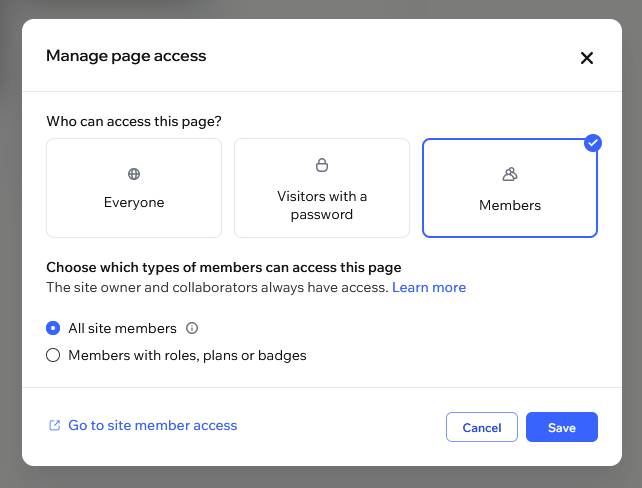
Click Settings and go to the Access tab. Click on Manage Access.

Change the page access from everyone to Members only. If you're using roles or plans, select which specific role or plan should access this page.
Note that you'll need to set permissions for each page individually. I've found this gets time-consuming when you're managing content for multiple clients, but you need to be careful so people only see the content they’re allowed to see.
5. Set up member roles for clients
Back in the Editor, click on My Apps in the top left menu. Then, click on Manage Access.

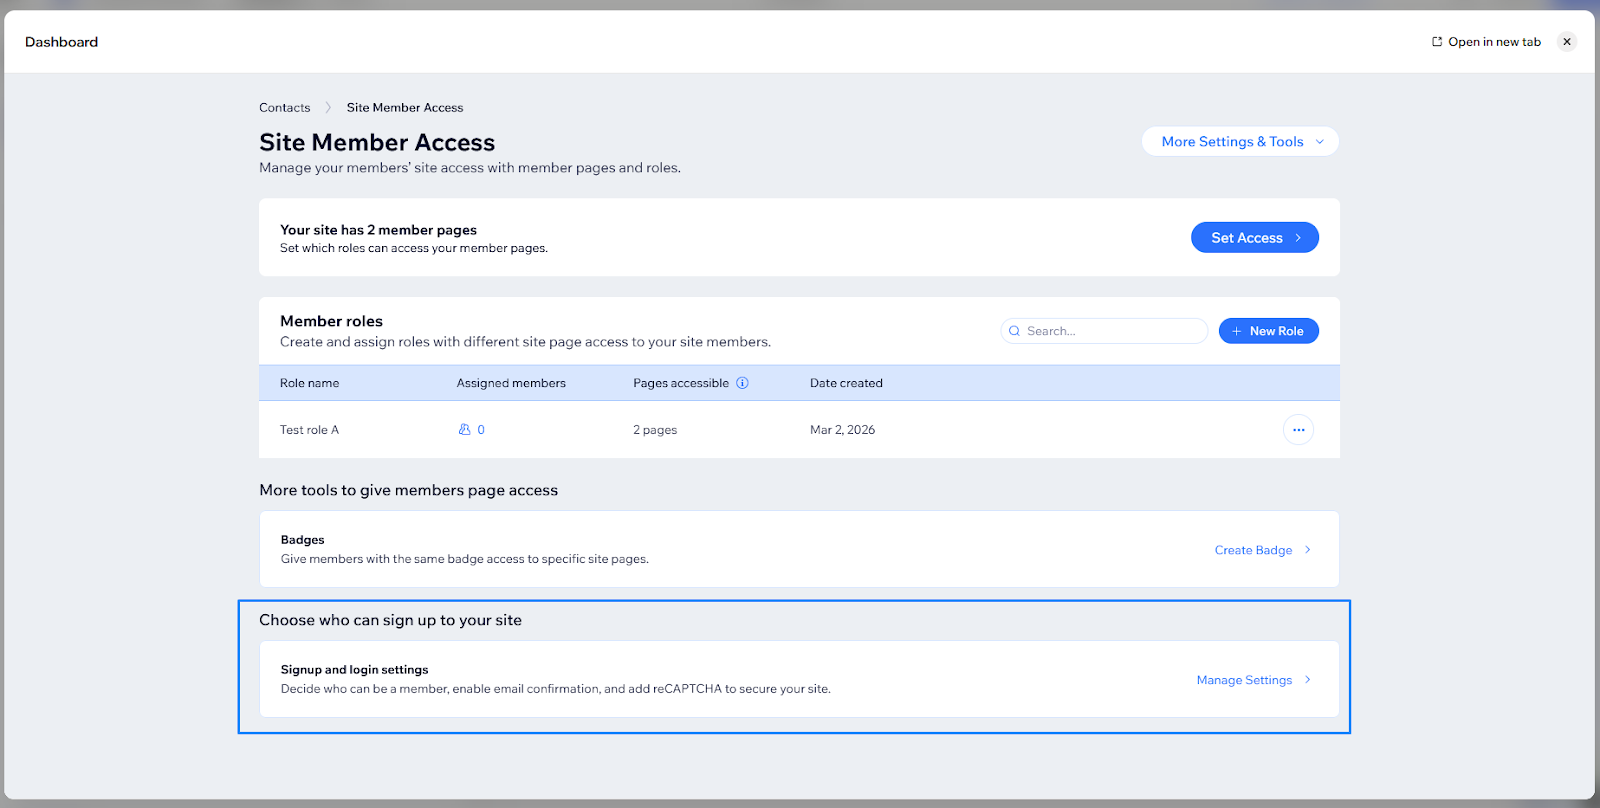
This will open the Site Member Access panel, where you can see Member Roles.
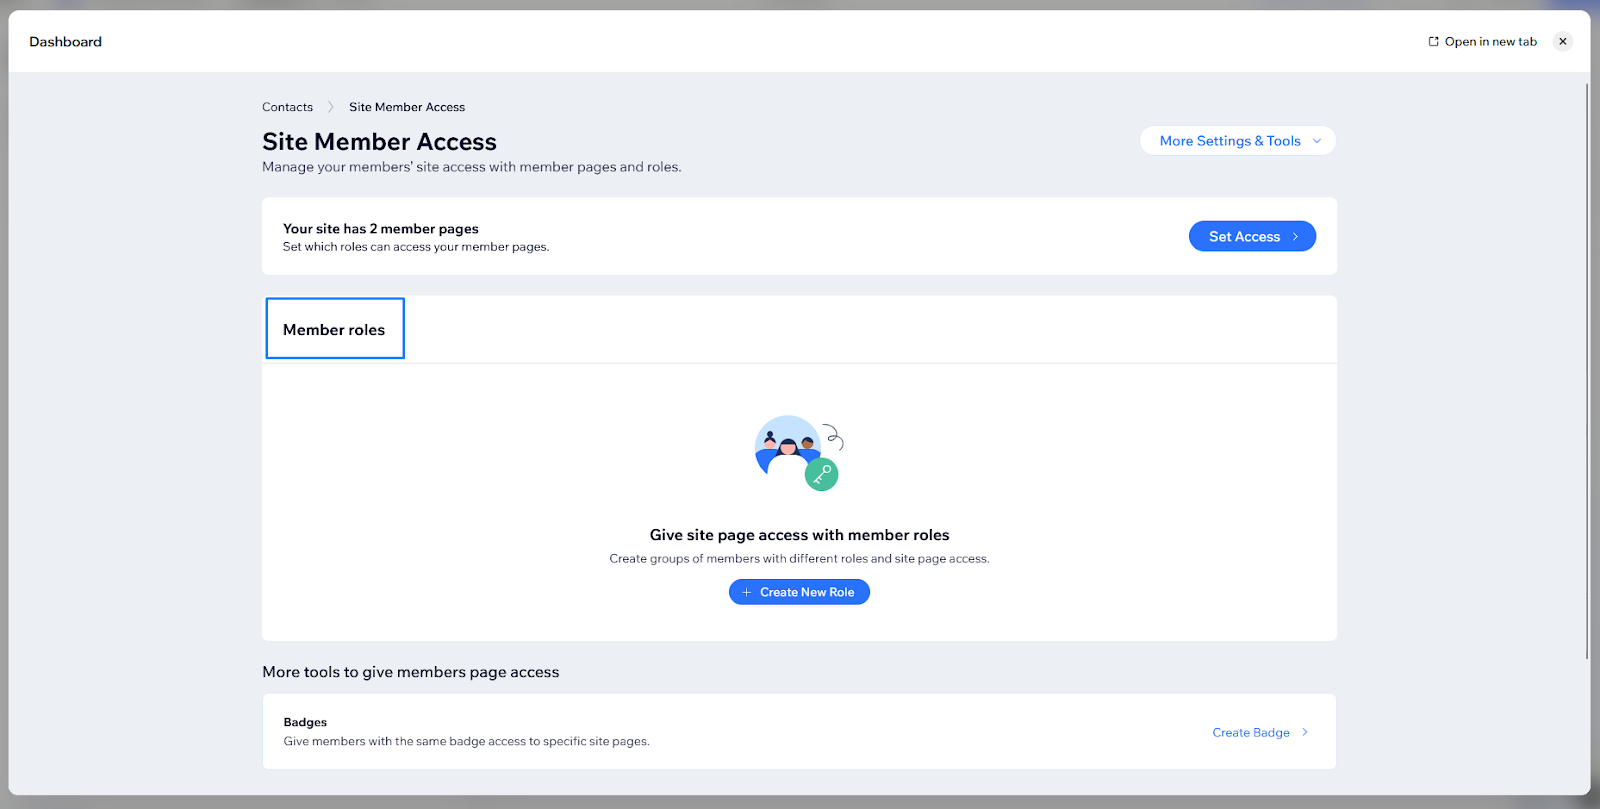
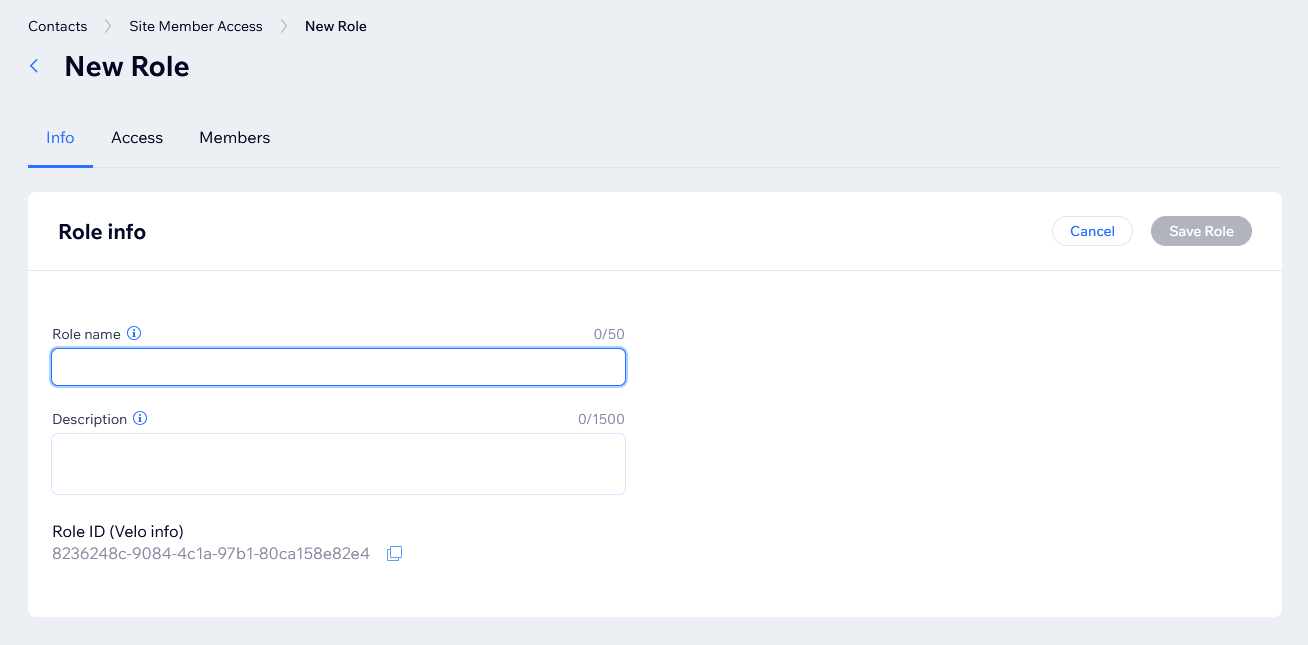
Click on Create New Role and fill in the Role name and Description. Click Save Role when you’re done.
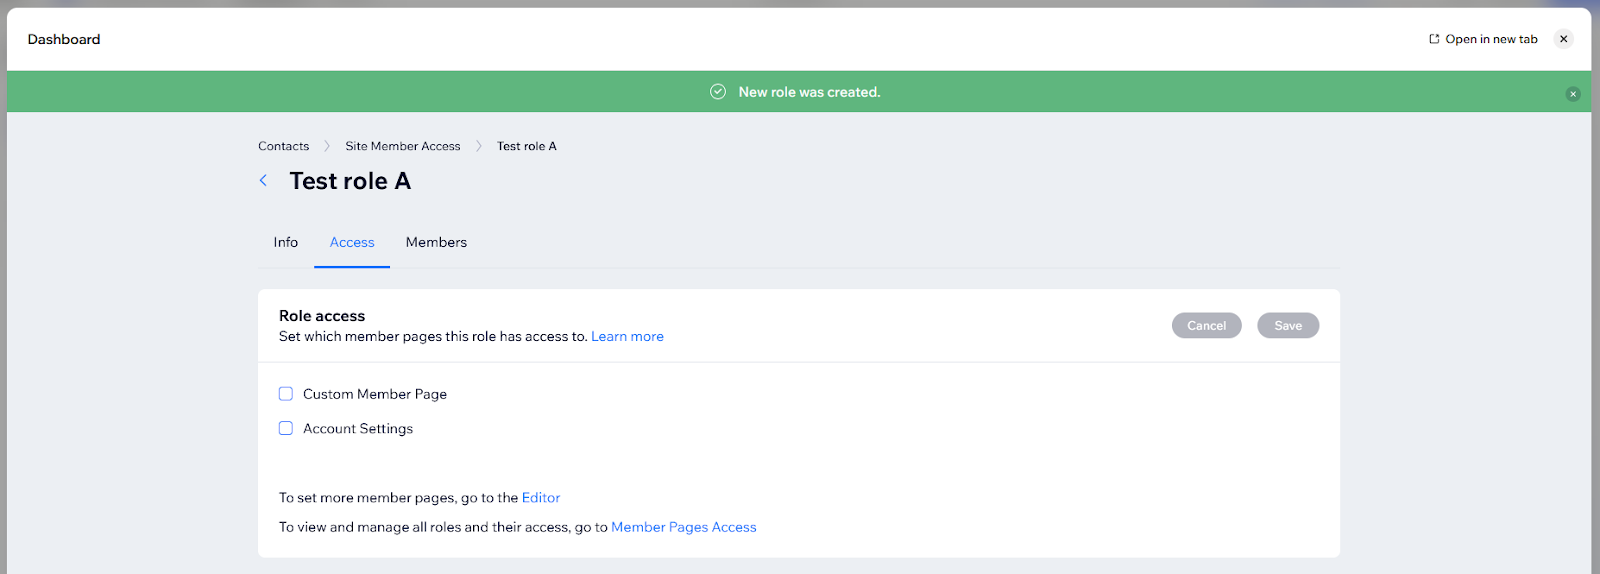
Once your new role is created, you’ll be able to see the Role access panel, where you can select which pages to allow this role to see. Click on the checkboxes of all the pages you want to give them permission to, then click Save.
6. Control signup and login behavior
In the same Site Member Access panel, navigate to Signup and login settings, then click on Manage Settings.
On the Signup & Login Security page, you can choose whether anyone can sign up freely or whether signups require your approval.
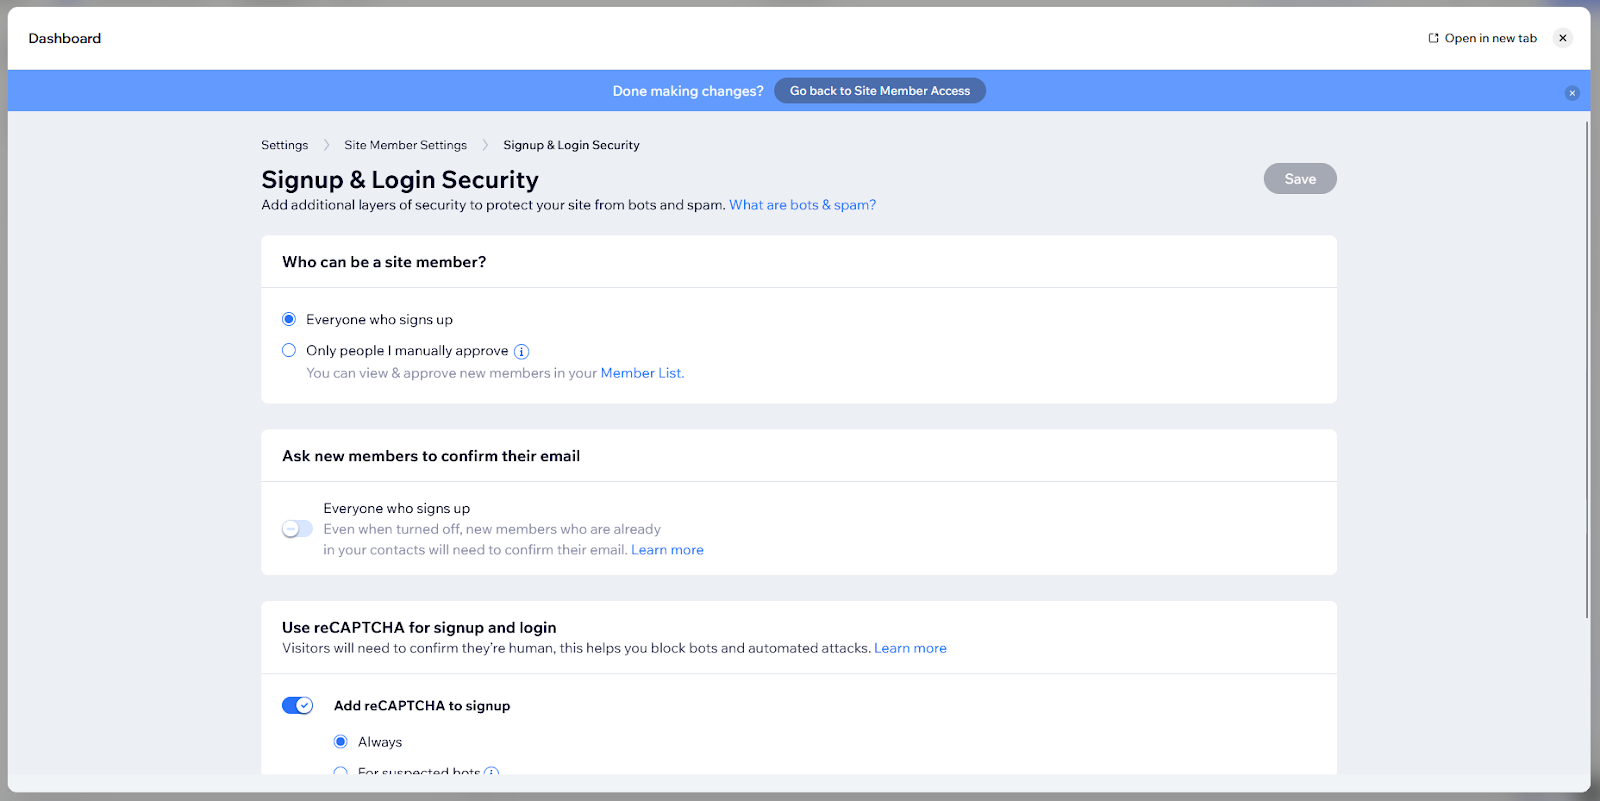
Manual approval means you review and accept each signup before clients can access your portal. This gives you more control but requires checking regularly for new signups. Automatic approval lets clients access the portal immediately after they register.
You can also customize the signup form fields to collect any information you need from clients during registration.
Method 2: Password-protected pages
This method is simpler and lets you gate pages with a password you set. Users don't need to create accounts, but this only works for basic content sharing. I don't recommend password pages if you're handling confidential client data or need to track who accessed what, since anyone with the password can view the content and there's no audit trail.
Note: You’ll need to create individual pages and set passwords for each. I recommend keeping track of the pages and passwords to make sure you’re not giving the wrong people access to pages they’re not supposed to see.
Here's how to set passwords to protect your pages:
Open your site in the Wix Editor. Click the page dropdown at the top of the Editor to open the Site Pages panel.

Click on the three-dot icon, then click on Settings in the dropdown menu.

In the Access tab, click on Manage Access.
In the Manage page access panel, click on Visitors with a password.
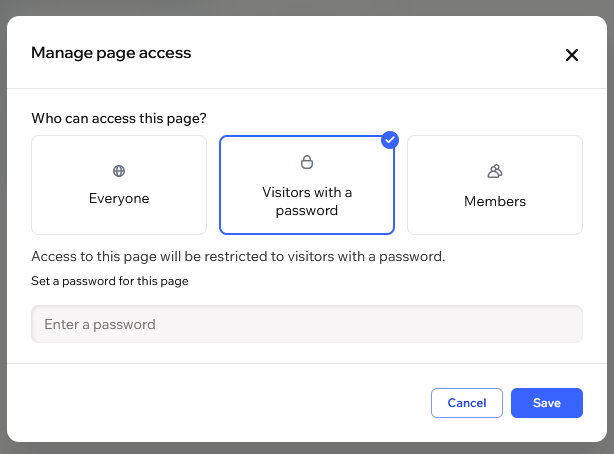
Enter your chosen password, then click Save.
Tip: Do this for every page you want to password-protect. Keep all of your passwords secure and hidden, ideally with a password manager to help you keep track.
Method 3: Dedicated client portal software like Assembly
Assembly is a client portal software tool built on a core CRM. We designed it for teams that want a client portal where contracts, billing, messages, files, tasks, and reporting can stay connected to the same client record.
It works well alongside Wix because Wix can focus on your marketing site, lead capture, and service pages, while Assembly handles the private client portal through a login link or custom domain. That way, you don’t have to build and manage client-only workflows inside Wix pages.
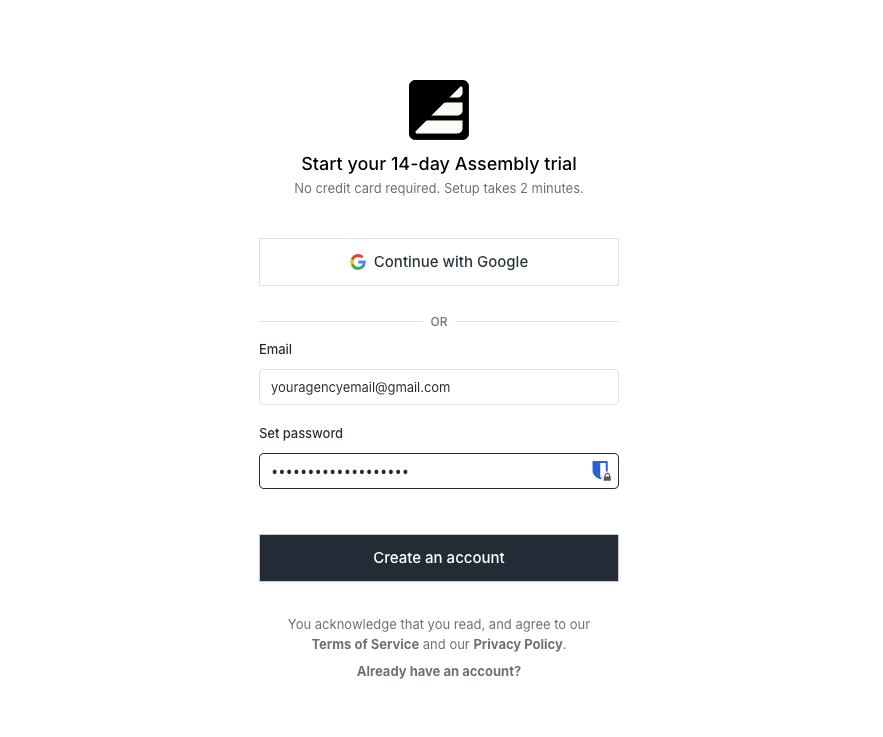
1. Create your Assembly account
Sign up for an Assembly account and complete your workspace setup.
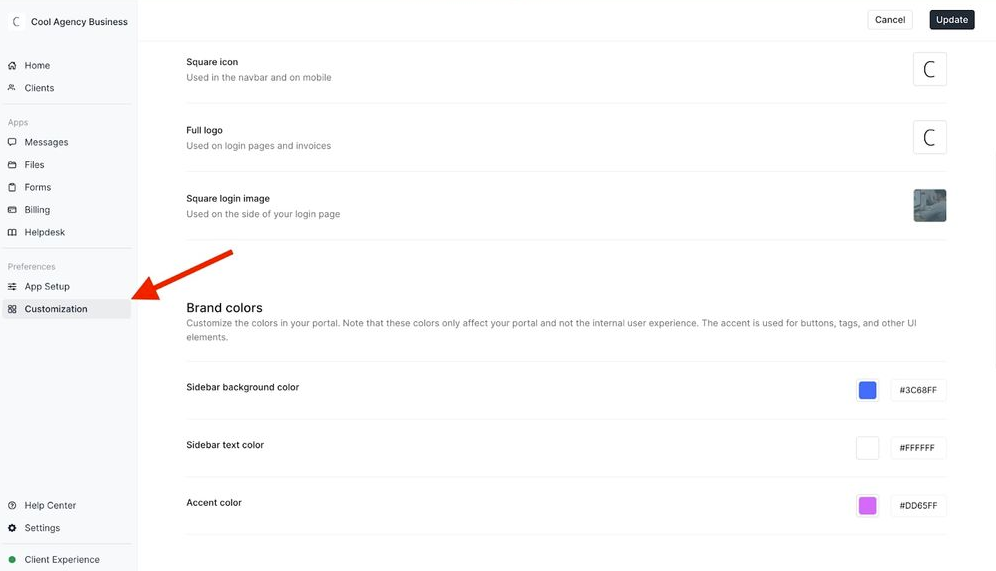
Once you’re logged into your dashboard, navigate to Customization on the left side menu. Add your company name, logo, brand colors, and custom domain if you want clients to log in through a branded URL. This becomes the client-facing workspace where all communication and documents live.
2. Add your clients
Navigate to the Clients page. Click on New client > Create one client. Fill in all the necessary details, then click on Create.
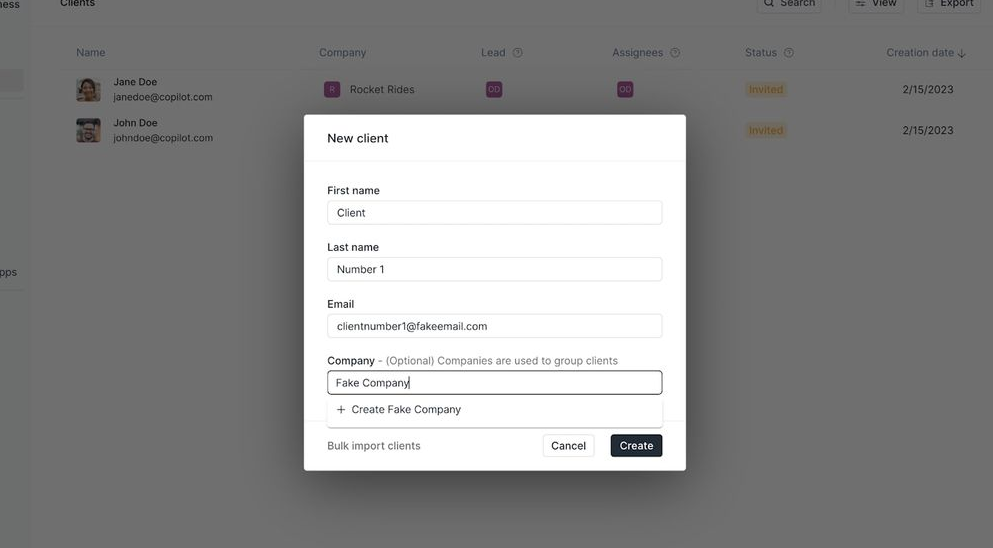
Create a new record for each client, or click on Bulk import to upload many at once.
3. Set up apps
In your Assembly dashboard, navigate to Apps > Add an App from the left-hand menu.
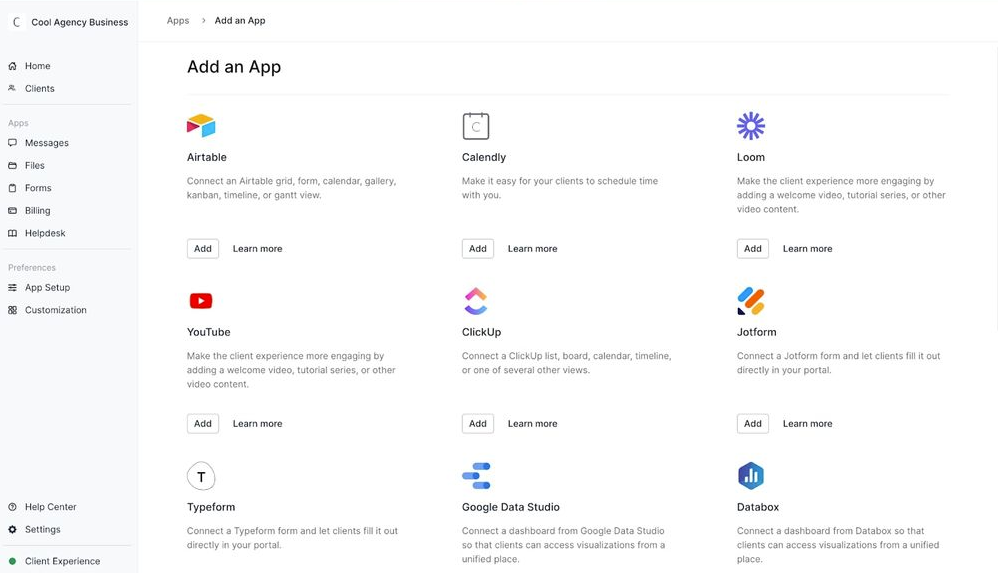
Here, you can choose to add apps for billing, tasks, messaging, and file management. You can also see all the services that Assembly integrates with, such as Airtable and Calendly.
Connect all the apps and services that make sense for your needs. If you run ongoing services, this step becomes the core of your portal.
Tip: You can visit our App Store to learn more about our apps and integrations.
4. Set up your custom URL
Once you’ve customized your client portal, head to Settings and select the Domains tab. This section controls the URL clients use to access their portal.
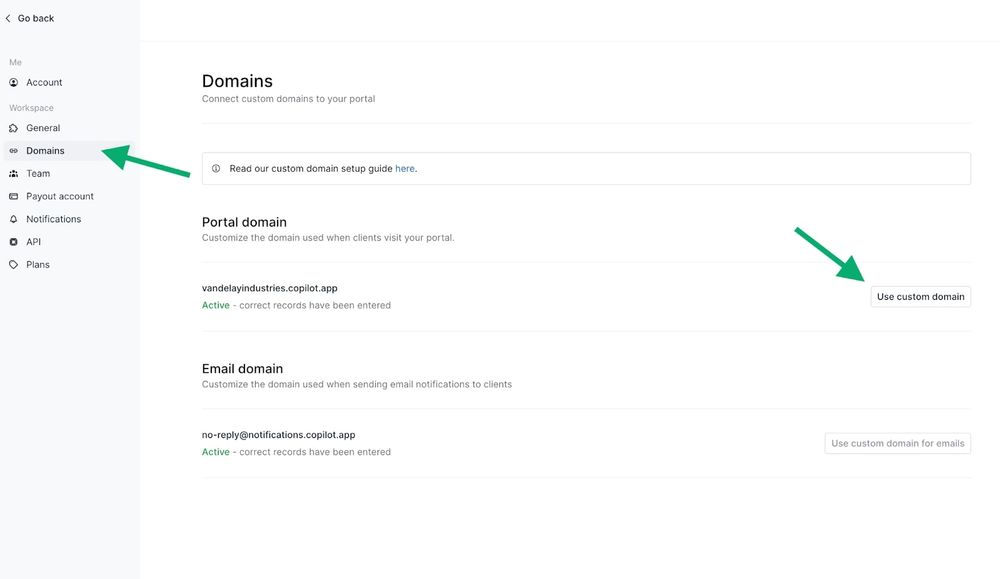
Your Wix site stays as your main website at yourcompany.com. For the portal, you have two options:
- Set up a subdomain like portal.yourcompany.com to keep everything connected under one domain
- Use a completely separate domain like yourcompanyportal.com.
Either way, this URL becomes the link you'll use to connect your Assembly portal to Wix.
Tip: Custom domains are available on Assembly’s Professional plan and higher. Setting up a custom domain requires DNS configuration through your domain registrar. You can check Assembly's domain setup guide for step-by-step instructions specific to your provider.
5. Link your Assembly client portal to Wix
Open your Wix Editor and navigate to the page where you want to add the portal link, like your homepage or a dedicated client access page.
Click + Add in the left toolbar, select Button, then choose a button style to place it on your page. Position it in your header, footer, or any spot where clients will expect to find portal access.
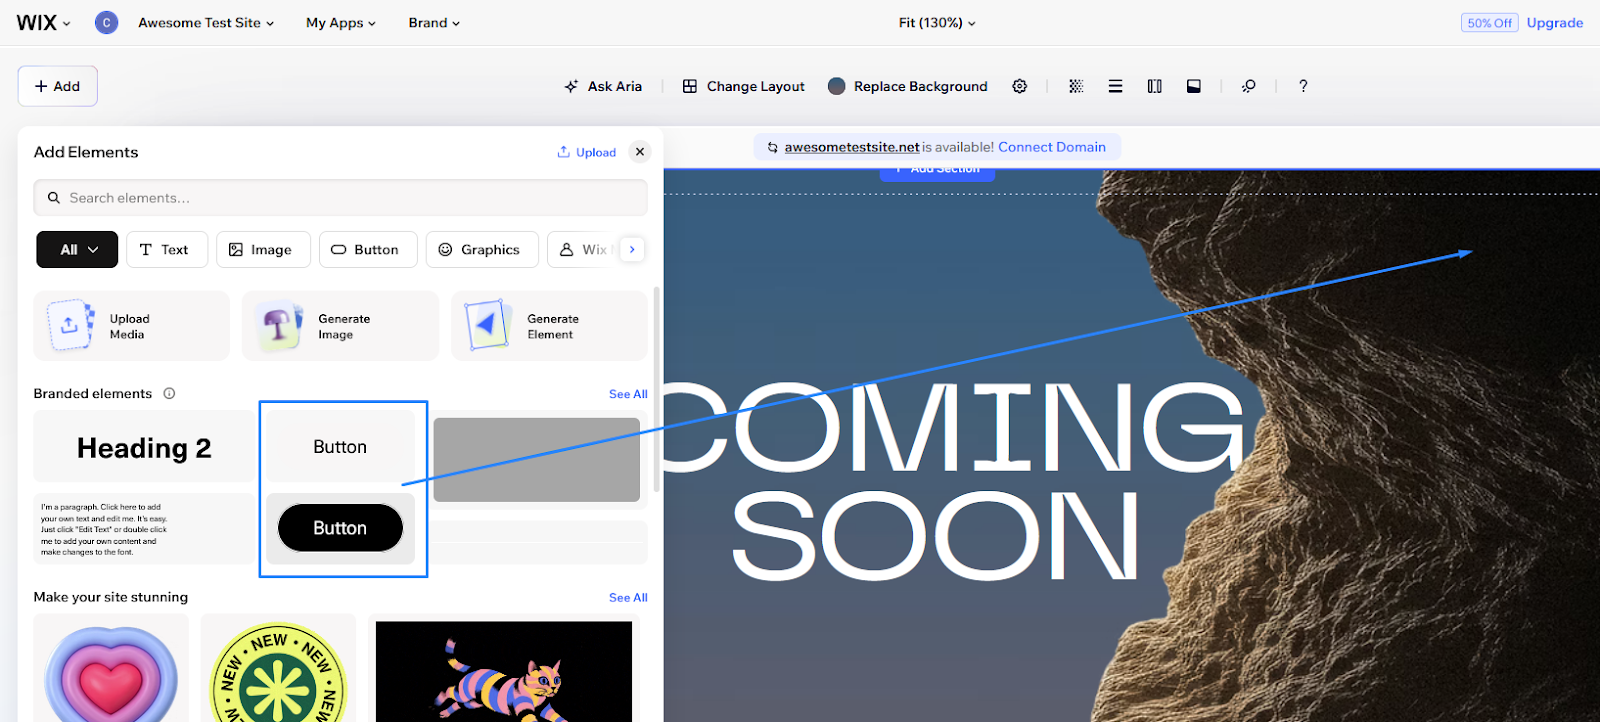
Click the button to open its settings panel, which will show as a toolbar above your page. Click on Link > Choose a link.
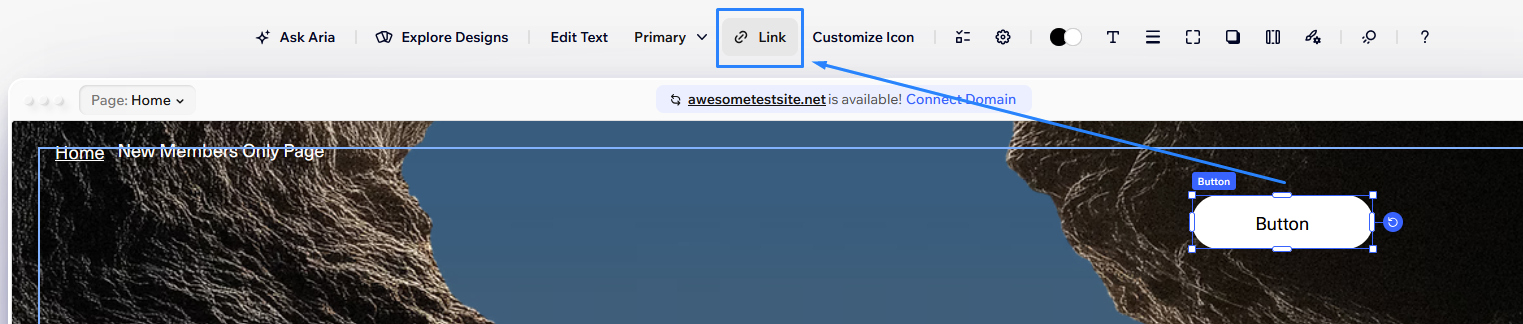
In the Link section, click on the globe icon to input a web address.
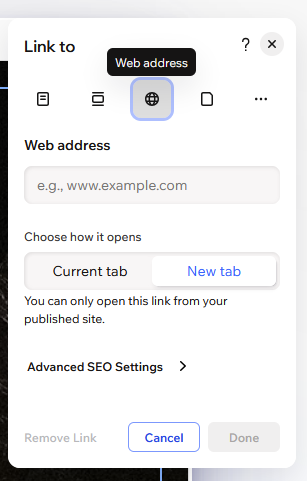
Paste your Assembly portal URL (the custom domain you set up in step 4). Change the button text to something clear like "Client Portal" or "Login," so clients know where it goes. You can style the button to match your site's design using the design settings. Click Done.
Now, when clients click on the button that you created, they can log into the client portal you set up in Assembly.
Tip: You can also add this link to your site's navigation menu instead of using a button, though I recommend a button for ease of use.
6. Test your portal and invite clients
At this stage, your portal link should direct clients to your Assembly workspace. Now test the complete experience from your Wix site.
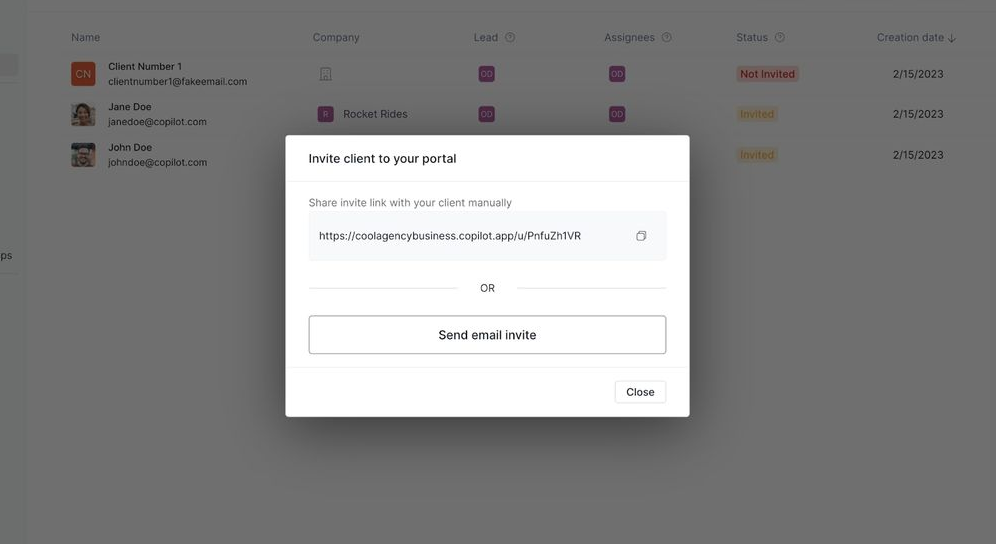
You can do this by creating a test client in Assembly, following step 2. Once you’ve created a client, send yourself the invite link. Follow the steps in the email to create your account.
Then, go to your Wix website and log in using the client portal button you added in step 5 so you can test everything in the workspace.
When you’re ready, you can finally start inviting your clients so they can use your portal.
Which method should you choose?
The right approach depends on what you need from your client portal and how much time you want to spend on setup and maintenance.
Choose the Members Area app if:
- You're sharing static content like files, resources, or project updates that don't change frequently
- You only have a few clients and can manage the manual role assignments
- Basic access control is enough for your needs
- You're comfortable with ongoing manual work to set up pages and assign roles for each new client
- Your portal needs are simple and lightweight without billing, contracts, or collaboration features
Choose password-protected pages if:
- You need to share content with one or two clients without setting up user accounts
- Quick setup matters more than role-based permissions
- Clients don't need to log in or manage profiles
- You're okay with sharing passwords directly with clients
- You want the simplest possible setup without any apps or configuration
Choose Assembly if:
- You manage ongoing client work that requires project updates, file sharing, billing, and communication in one place
- Clients need a professional branded workspace instead of website pages
- You want to automate workflows and reduce manual administrative tasks
- Client collaboration is central to your business, not just content delivery
- You need features like contracts, invoicing, and payment processing alongside your portal
- You prefer updating client information in a portal rather than rebuilding Wix pages each time
Best practices for Wix client portals
Setting up a Wix client portal gets you started, but how you organize it and communicate with clients determines whether they actually use it.
Here are some practices to keep your portal functional and client-friendly:
- Keep your member page structure simple and clear: Clients shouldn't have to hunt for what they need. Use straightforward page names like "Project Files" or "Invoices" instead of vague labels. If you're using the Members Area app, I recommend organizing pages logically in the member menu so clients can find information quickly.
- Set clear expectations with clients about how to use the portal: Send them a quick walkthrough email when you give them access. Include their login URL, what they'll find inside, and when to check for updates. Many clients won't log in regularly unless they know what to look for.
- Stay on top of role assignments if you're using the Members Area method: New signups don't automatically get assigned to the right role, so you'll need to check for new members and manually assign them. Set a reminder to review pending members at least weekly, or you'll end up with clients who can't access their content.
- Consider your growth plan: The Members Area app requires manual setup for each client and page. If you're planning to scale beyond 5-10 clients, the administrative work adds up quickly. Think about whether you'll need a more automated solution as your client base grows.
Ready to create a branded client experience? Try Assembly
Building a Wix client portal with the Members Area app or password pages requires manual setup and ongoing maintenance. Assembly gives you a purpose-built portal platform that connects to your Wix site and handles the client relationship work your website wasn't designed to manage.
Here’s what you can do with Assembly:
- Give clients a branded portal: Clients log into a space that reflects your brand to access contracts, invoices, files, and project updates without email back-and-forth.
- Keep tasks, messages, and files together: Client communication, shared files, and project tasks stay connected to each client record instead of being scattered across separate tools.
- Track client details and activity: Manage client records, communication history, and relationship data in a structured CRM that keeps everything organized in one place.
- Prep faster for meetings: The AI Assistant summarizes recent client activity and communication, helping you walk into calls with a clear picture of what’s been discussed and what’s outstanding.
- Protect client data: Assembly maintains SOC 2 compliance and supports GDPR, CCPA, and HIPAA compliance.
- Embed a custom dashboard or analytics platform: Assembly lets you embed custom-built dashboards from Looker Studio, Databox, and other major service providers that offer embedding, as well as create custom dashboard apps specific to your business.
- Cut down on admin: Automate repetitive jobs like reminders or status updates that used to take hours. The Assistant handles the busywork so your team can focus on clients.
Ready to simplify how you manage client work? Start your free Assembly trial today.
Frequently asked questions
How many clients can you manage with a Wix client portal?
You can manage a very large number of clients with a Wix client portal, and there isn’t a stated cap on member accounts. The real limit comes from manual setup, since you’ll assign roles and page access one client at a time. As your list grows, managing permissions and updates takes more time.
Can clients upload files to a Wix client portal?
Yes, clients can upload files if you add a form with a file upload field or use a file-sharing app. File uploads aren't included in the Members Area by default, so you'll need an app like Wix File Share to add this feature. Storage limits and file size restrictions depend on your Wix plan, and you'll manage folder organization and permissions manually.
Can you charge clients for access to your Wix client portal?
Yes, you can charge clients for accessing your Wix client portal using paid memberships or the Wix Pricing Plans app. You’ll need a Core or higher Business plan to accept payments. After you create a plan, you can restrict certain pages to paying members only. You’ll manage pricing rules and access settings for each plan yourself.
Your clients deserve better.
Try for free for 14 days, no credit card required.