
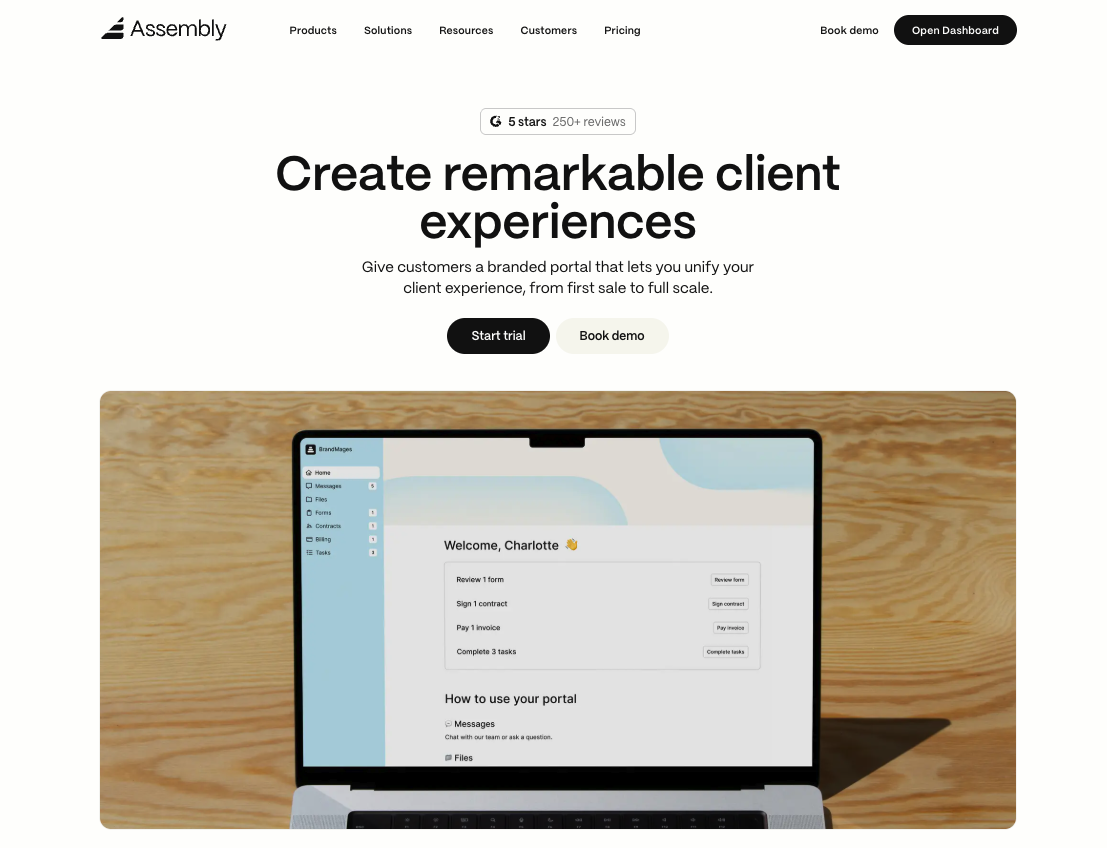
Create a customer portal in minutes.
Try Assembly to create and manage your own customer portal - free for 14 days, no credit card needed. Set up your account in minutes
4.9 rating
You can create a customer portal in minutes by picking a no-code platform, adding your branding, and inviting clients. After researching what makes portals succeed or fail for service businesses, here's what you need to know.
How to create a customer portal in 6 steps
Creating a customer portal doesn't need to be complicated. Here's what matters when you're setting one up:
Step 1: Define your goals and requirements
To define your portal goals, write down the specific problems you need to solve. Are clients constantly emailing for project updates? Are invoices getting lost in threads?.
Next, map out your users. Will some clients need billing access while others only see project files? Clarifying permission needs upfront helps you pick the right features from the start.
I recommend that you split your requirements into must-haves and nice-to-haves. You might need secure file sharing and invoicing immediately, but project tracking can wait. This keeps the platform selection process manageable.
Step 2: Choose the right customer portal platform
The right platform depends on your technical comfort level. If you don't have developers on staff, skip anything requiring code. No-code client portal platforms like Assembly let you launch without technical skills, and for most service businesses, that's a practical starting point.
When evaluating platforms, keep these in mind:
- Features: Look for the tools you actually need, whether that's security, file management, communication tools, or billing.
- Integrations: If you're using QuickBooks, Google Workspace, or a CRM, your portal should connect with those systems; otherwise, you're back to manual data entry.
- Pricing structure: Some platforms charge per internal user, others per client, and some use flat rates. Calculate your costs at scale before committing, since pricing that works at 50 clients may not work at 200.
For the rest of this guide, we'll walk through the setup process using Assembly as the example.
Step 3: Set up branding and customization
Once you’ve logged into Assembly, click on Customization (under preferences on the sidebar) to set up your branding. Upload your logo, set your brand colors, and choose a font that matches your website.
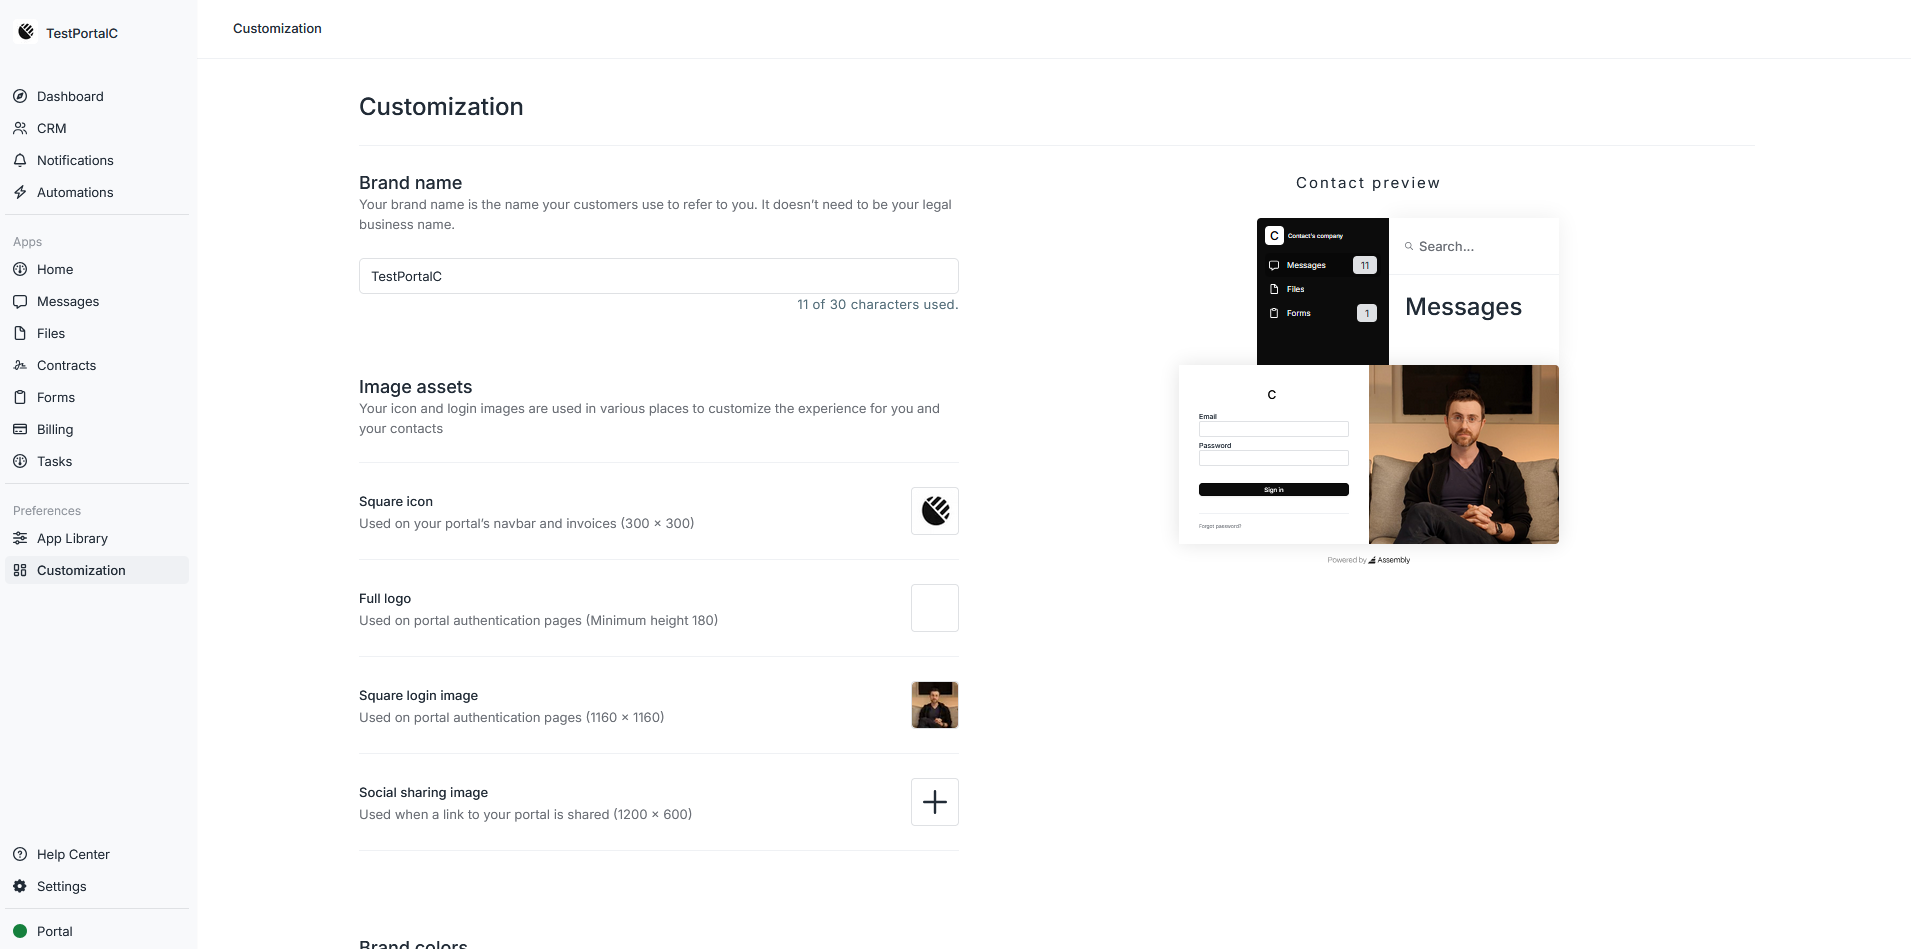
Customize your login page with a welcome message and any important information clients should see when they first access the portal. Keep it brief and focus on what clients need to know to get started.
Tip: Assembly also lets you set up a custom domain on the Professional plan, so clients log in at portal.yourcompany.com rather than a generic URL. A custom domain ties the portal to your brand and avoids confusion for first-time visitors.
Step 4: Configure core features and integrations
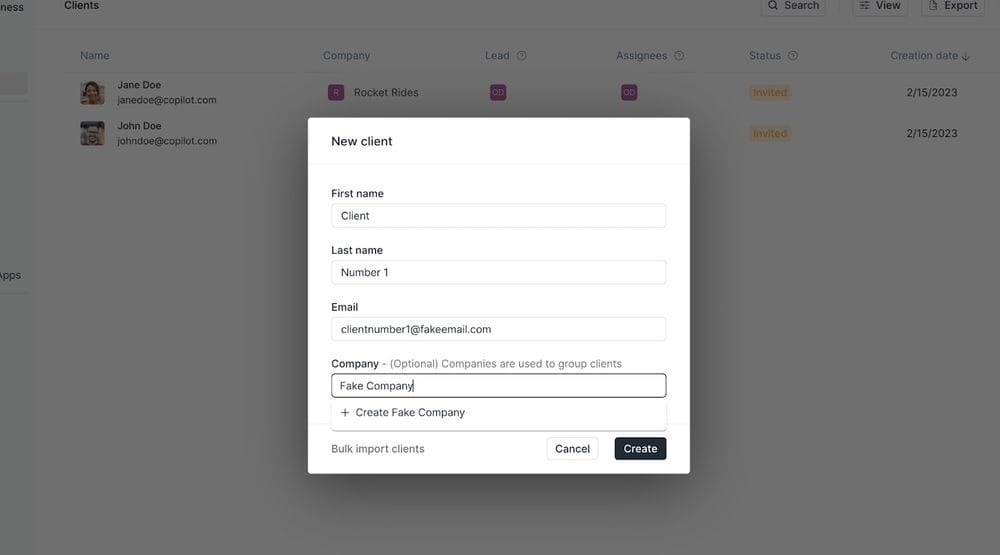
Start by setting up your client portal before inviting clients. In your Assembly dashboard, go to the App Library on the side bar. Here, you can choose which apps your clients can see.
Connect the external tools you identified by clicking + Add app. You can link your project management software, CRM, or accounting tools so data syncs automatically rather than requiring manual updates.
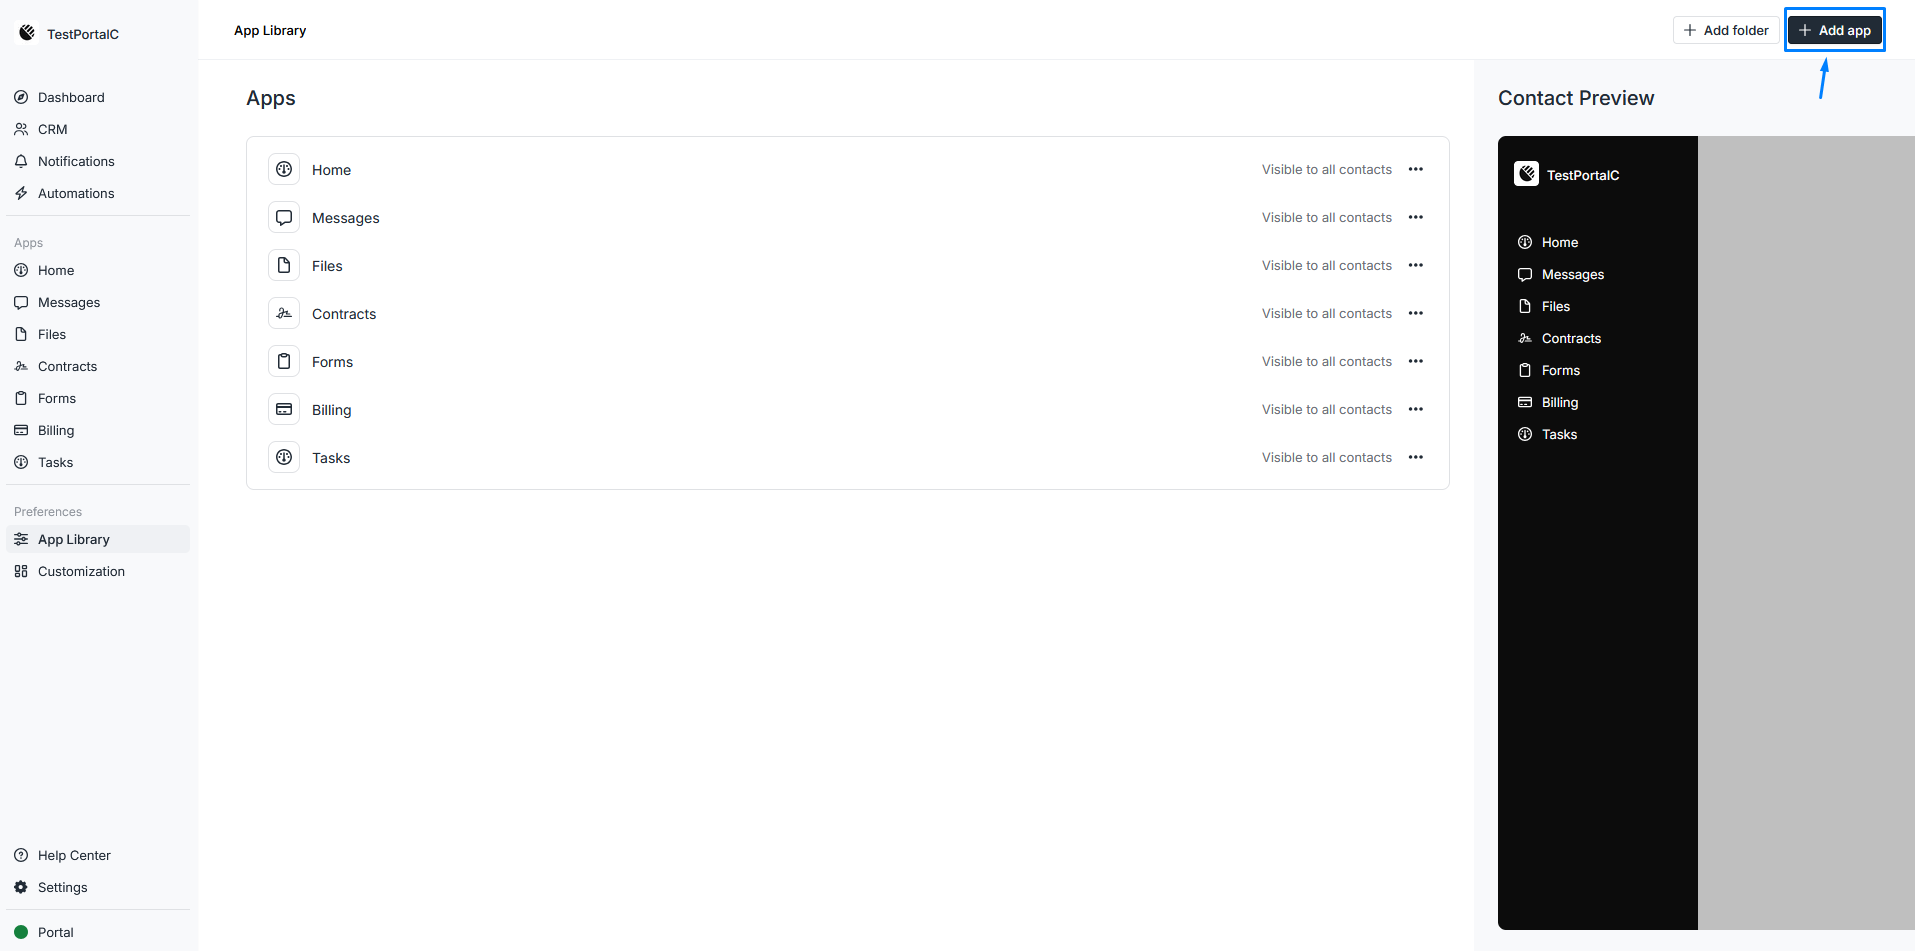
You can also click on + Add folder to create folders that match how your work is organized. That way, clients can find what they need without asking you.
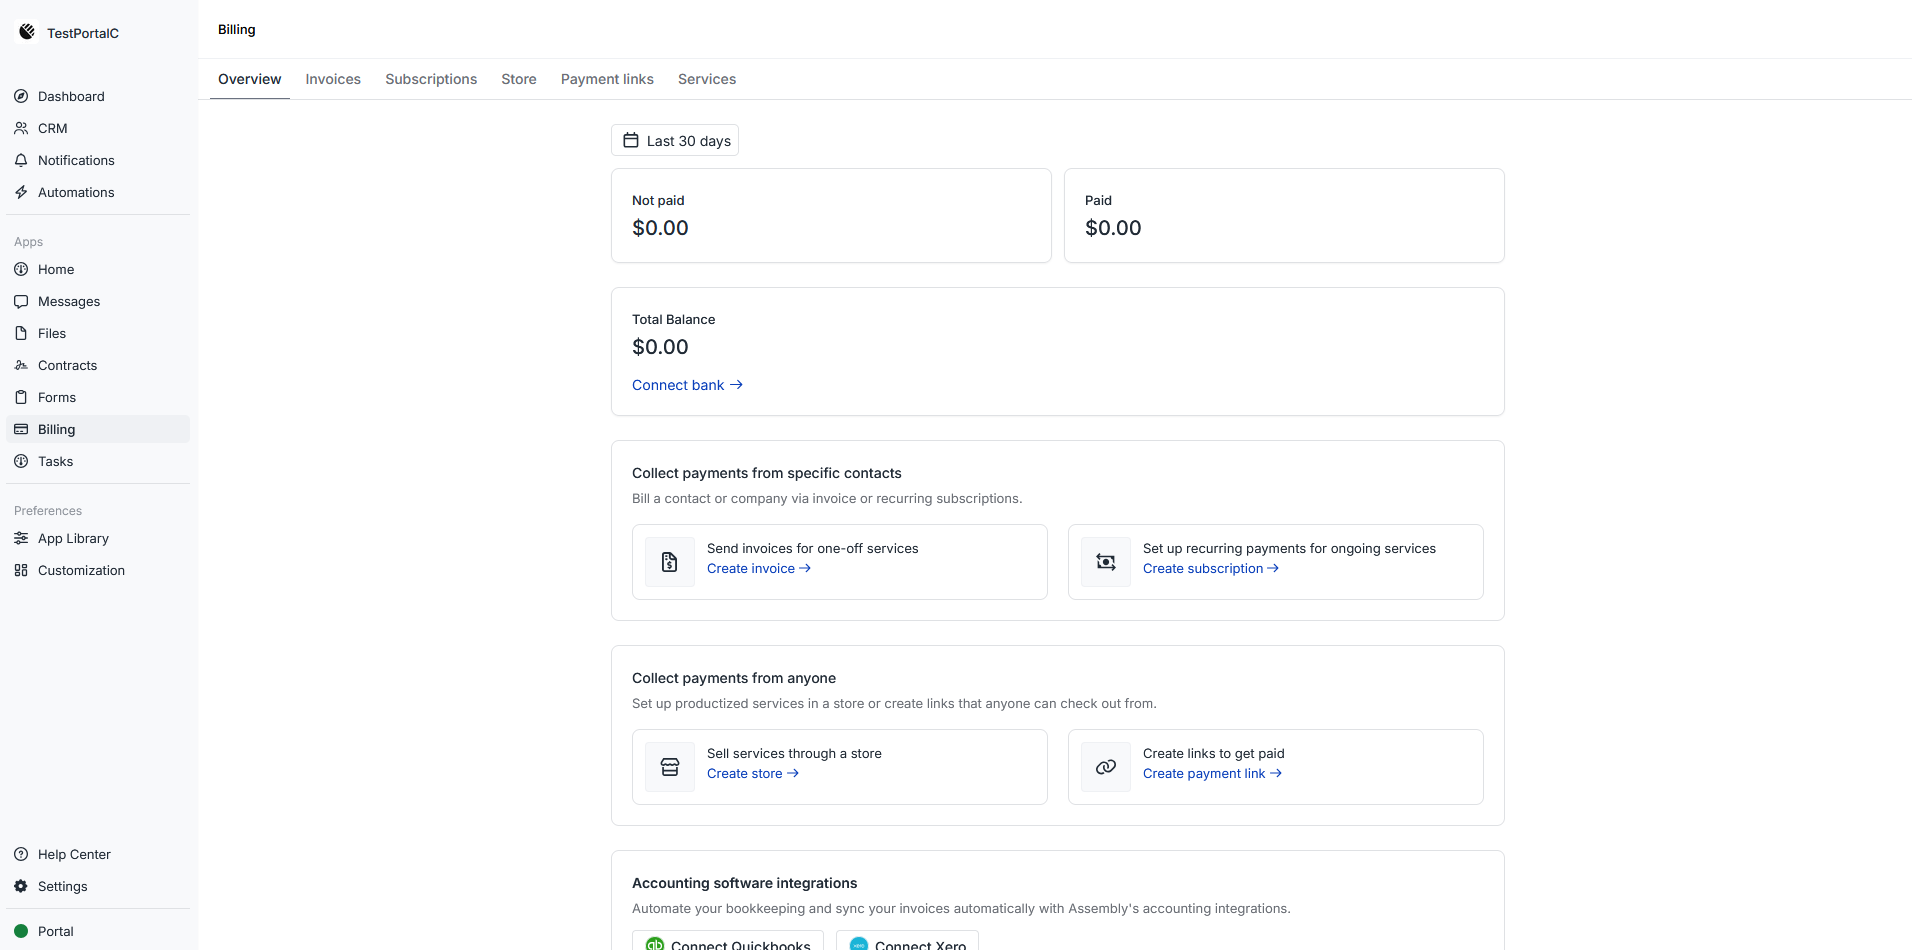
To set up billing, click the Billing link on your sidebar. You can also add a payment method, create a subscription, or send an invoice directly to your client.
Step 5: Create content and organize information
Build out a knowledge base with articles that answer your most common client questions. If clients regularly ask how to download files or where to find invoices, document those processes once and link to them from the portal home page.
You can also create templates for anything you send repeatedly. Set up a contract template, a standard invoice format, and any intake forms you use across clients. This cuts setup time significantly when onboarding new clients.
Step 6: Test, invite clients, and launch
Before inviting clients, test everything yourself. Upload a file, send a test invoice, try the messaging system, and check mobile responsiveness. Click through every feature and make sure it works as expected. It's better to catch issues now than after clients are using it.
Invite a small group of clients first rather than everyone at once. This lets you work out any kinks and gather feedback before your full launch. Pay attention to what confuses people and what questions they ask. Use that feedback to improve documentation or adjust your setup.
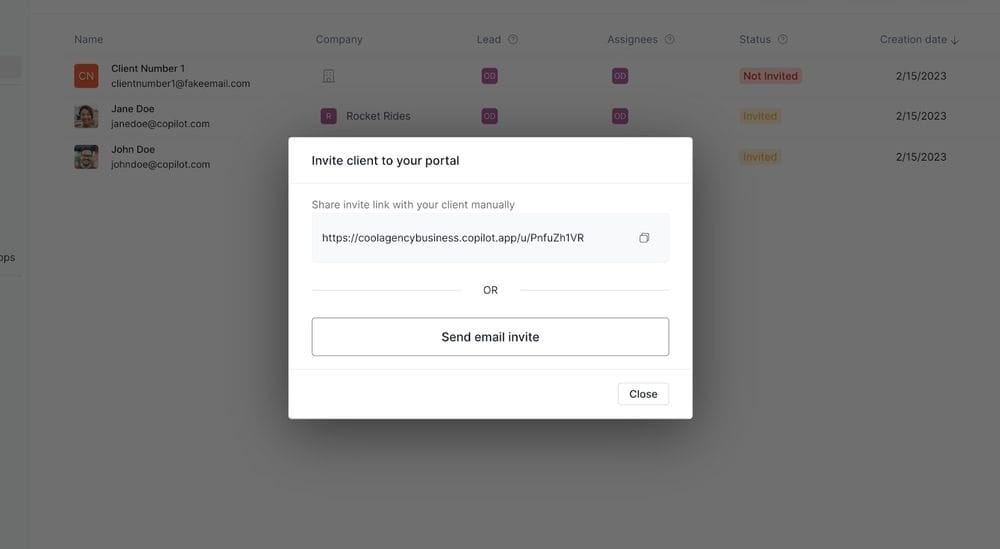
Once you're confident everything works, invite the rest of your clients. Send a clear email explaining what the portal is, why you created it, and how to log in.
Tip: Include instructions for their first login and where to find help if they get stuck. Monitor usage in the first few weeks and reach out to clients who aren't engaging to see if they need help.
Why you need a customer portal for your business: Key benefits
You need a customer portal to give clients a central place to access files, track projects, and communicate with your business. This improves efficiency for both sides while creating a more professional client experience.
Customer portals can:
- Reduced admin work: A portal gives clients one place to check everything, so you're not resending files or answering the same questions repeatedly. You update information once, and it's available to everyone.
- More professional client experience: Email threads and shared drive links work, but they don't create a cohesive experience. A branded portal with your logo and custom domain gives clients a central hub that reflects your business.
- 24/7 secure access: Clients access what they need on their own schedule without relying on email attachments or expiring shared links.
- Accurate information: Everyone views the latest contract, invoice, or project update in one place, which reduces confusion from outdated versions circulating in email.
- Scalability: Adding a new client means setting up their account, not building a new system. In my experience, this makes a real difference once you're managing more than a handful of clients.
- Faster payments: Clients who can view and pay invoices in one place tend to pay faster than those managing invoices through email.
- Client engagement insights: Some portals include analytics showing which clients are active and which haven't logged in recently, so you can reach out before issues surface.
Key features to include in a customer portal
A customer portal should cover secure authentication, file management, and communication tools at a minimum. Features like white-labeling, integrations, and analytics add more value as you scale.
Here are the key features to look for in a portal:
- Secure login and user management: Multi-factor authentication, session timeouts, and role-based permissions protect client data. Not all entry-level portals include these by default, so it's worth checking before you commit.
- File storage and sharing: Organized folders, version control, and download permissions help clients find the right files without asking you.
- Communication tools: Built-in messaging keeps conversations tied to projects, files, or invoices rather than scattered across email threads. In my opinion, this is one of the more important features to prioritize.
- Mobile responsiveness: The portal should work on phones and tablets with readable text and tap-friendly buttons.
- Billing and invoicing: Integrated billing lets you send invoices, accept payments, and track payment history in one place.
- Project and task tracking: Status indicators like in progress, under review, or complete give clients visibility without them needing to ask for updates.
- White-label branding: Custom domains, logos, and brand colors make the portal look like part of your business rather than a third-party tool.
- Integration capabilities: Native integrations or automation tools sync your portal with CRM, accounting, and project management systems.
- Self-service knowledge base: FAQs and guides help clients find answers on their own, which cuts down on repeat questions over time.
- Real-time updates: File uploads, status changes, and invoice updates should appear immediately to avoid confusion from outdated information.
- Analytics and reporting: Usage insights show how clients interact with the portal and where you might need to make adjustments.
- Customization and flexibility: Custom fields and layouts let the portal match your workflows and client needs.
- Scalability: The platform should support more clients and team members as your business grows without requiring a migration.
Customer portal best practices
Setting up a customer portal is one thing, but running it effectively is another. Here are some best practices for a successful portal:
Keep your content current
Schedule a weekly review to update project statuses, remove outdated files, and refresh any time-sensitive information. When clients see old statuses or expired documents, they may stop trusting the portal and start emailing you again.
Make onboarding simple
A quick start guide that walks clients through logging in, finding files, and completing common tasks is the fastest way to drive adoption. A short welcome video (even just 2 to 3 minutes) can help, since many clients find it easier to follow along visually than to read through written instructions.
Monitor usage analytics
Check analytics monthly to identify which features clients use and which ones they ignore. If no one is using your knowledge base, the articles may not be helpful, or clients can't find them.
Gather client feedback regularly
Send a brief survey every quarter asking about the portal experience. Common complaints or confusion points often reveal simple fixes that improve how clients perceive your service.
Maintain strong security practices
Review user permissions quarterly to remove access for anyone who no longer needs it, and enable multi-factor authentication if you haven't already. Keep your team updated on security protocols on a regular basis.
Train your team thoroughly
Run regular training sessions for new features and keep internal documentation somewhere your team can find quickly. If a client calls with a question and no one on your team can help, that's a problem worth preventing.
Promote portal adoption actively
Reference the portal in your regular client communication to make it part of their routine. When you send files, remind clients they can also find them in the portal. When clients ask for updates, direct them there first.
Organize information logically
Use folder names and labels that make sense to someone logging in for the first time, not just to your internal team. Ask someone unfamiliar with your business to find a specific document and note where they get stuck.
5 best tools for customer portals
Some customer portal platforms focus on branded client experiences. Others focus on support ticketing or workflow automation. These five options cover different business types and priorities:
- Assembly is a no-code client portal platform built for service businesses. You can give each client a branded workspace with a tailored homepage, organize portal navigation with app folders, send invoices, and collect payments without leaving the platform. Messages, files, and notes stay tied to each client record so nothing gets lost across tools.
- HubSpot Service Hub: HubSpot Service Hub is a customer service platform that includes portal functionality for support ticketing and automation. It works well if you're looking for a customer-facing knowledge base or helpdesk, rather than full project collaboration. It's most effective for businesses already using HubSpot's CRM and marketing tools.
- Zendesk: Zendesk is a customer support platform with portal features designed for ticket management and self-service. It's a good choice for handling high volumes of customer support inquiries with AI-powered capabilities, rather than managing client projects or shared files.
- Clinked: Clinked is a client portal with built-in project management features like document editing and task boards. You can use it for both client-facing portals and internal team collaboration.
- Moxo: Moxo is a client interaction platform focused on workflow automation and secure collaboration. It's particularly well-suited for industries that require complex onboarding, document collection, and multi-stakeholder approvals, such as financial services or legal firms.
Tip: If you’d like to learn more about these tools, we also have a customer support portal guide.
Ready to create a branded client experience? Try Assembly
Learning how to create a customer portal doesn't require technical skills when you use the right no-code platform.
Assembly is a no-code customer portal platform built for professional service businesses. You can create tailored branded portals where clients access files, invoices, projects, and communication without switching between multiple tools.
Here’s what you can do with Assembly:
- Track client details and activity: Manage client records, communication history, notes, and relationship data in a structured CRM where that context stays accessible no matter where you are in the workspace.
- Dynamic branded portal: Each client logs into a workspace that reflects your brand, with content tailored to their account. You control what they see and keep internal tasks and notes separate from the client view. Group apps into sidebar folders to keep your own workspace organized by function.
- Recurring automations: Set time-based triggers for tasks, messages, and forms so routine accounting work like monthly reminders, document requests, and follow-ups runs on schedule without manual effort.
- Consolidated payments: Manage invoices, subscriptions, payment links, and store transactions from a single payments page, without jumping between separate billing views.
- Keep tasks, messages, and files together: Project tasks, shared files, and client communication all link to the same account, and you control what clients can see from their portal.
- Prep faster for meetings: The AI Assistant summarizes recent client activity and communication, helping you walk into calls with a clear picture of what’s been discussed and what’s outstanding.
- Cut down on admin: Set recurring automations for reminders, status updates, forms, and follow-ups so client work keeps moving with minimal manual effort.
Ready to simplify how your firm manages client work? Start your free Assembly trial today.
Frequently asked questions
What is a customer portal?
A customer portal is a secure website or app where clients log in to access their account information, view documents, track project status, and communicate with your business. Each client only sees their own files, invoices, messages, and project updates. Some platforms also support white-labeling, so the portal lives on your own domain and matches your branding.
What's the difference between a customer portal and a client portal?
The difference is that customer portals typically serve consumers for support tickets and account management, while client portals serve business-to-business relationships focused on projects and professional services. Both provide secure access to information, files, and communication tools.
Can clients access the portal from mobile devices?
Yes, many modern customer portals work on mobile devices, some with an app and others through responsive web design. You access the portal through your phone's browser, and the interface adapts to smaller screens with touch-friendly buttons and readable text. Some platforms also offer dedicated mobile apps.
What security features should a customer portal have?
A customer portal should have multi-factor authentication, automatic session timeouts, and role-based permissions. Multi-factor authentication requires a second verification method beyond passwords, session timeouts log users out after inactivity, and role-based permissions control what each user can access.
Your clients deserve better.
Try for free for 14 days, no credit card required.