
How to create a QuickBooks Online customer portal in 5 steps
Run your productized agency with Assembly
Assembly gives you the tools you need to start, run, and grow your client business. Try it for free!
4.9 rating
I tested QuickBooks Online to see what kind of client login experience it actually supports. In this 2026 guide, I’ll show you how to create a QuickBooks Online customer portal in 5 clear steps, including how to connect invoices, payments, and client access in one place.
Does QuickBooks have a customer portal?
QuickBooks Online (QBO) includes limited customer access, but it doesn’t provide a fully featured customer portal. Clients can receive invoice links, view balances, and pay online through QuickBooks Payments.
Most interactions happen through emailed invoices and payment links instead of a dedicated customer dashboard. To give someone login access, you’d need to add them as a user to the company file, which grants access to the accounting system rather than a purpose-built client workspace.
QBO doesn’t offer a centralized, branded portal where clients can manage documents, upload files, sign contracts, or communicate in one place. If you need a true QuickBooks Online customer portal that brings invoices, payments, files, and client access together, you’ll need to layer it with a dedicated client portal solution.
What you’ll need before starting
Before you create a QuickBooks Online customer portal, make sure you have the following:
- QuickBooks Online account: You’ll need an account with admin access so you can connect integrations and manage customer records.
- Client portal software: In this guide, I’m using Assembly to create the client login experience. The QuickBooks Online integration requires a paid plan, starting at $39 per month, billed annually.
- Payments enabled: If you want clients to pay invoices directly inside the portal, you’ll need to connect your payout account, integrate with QuickBooks Online, or embed QuickBooks Payments.
Setup typically takes under an hour once you connect QuickBooks Online to your client portal tool. However, this doesn’t include the time needed for setting up your client portal.
How to create a QuickBooks Online customer portal with Assembly
To create a true client login experience with centralized access to invoices, payments, and documents, here’s how to connect QuickBooks Online to dedicated client portal software.
Here are the 5 steps to set it up:
Step 1: Customize your client portal
Log in to Assembly and complete the initial onboarding steps from your Home dashboard. The checklist will walk you through setting up your portal and preparing it for client access.
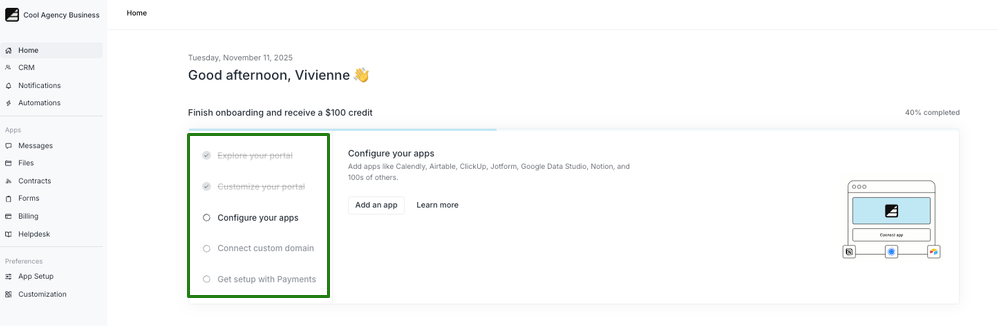
I’d work through the branding and basic setup items now, so your portal feels polished before you connect QuickBooks in the next step.
Step 2: Set up the QuickBooks Online integration
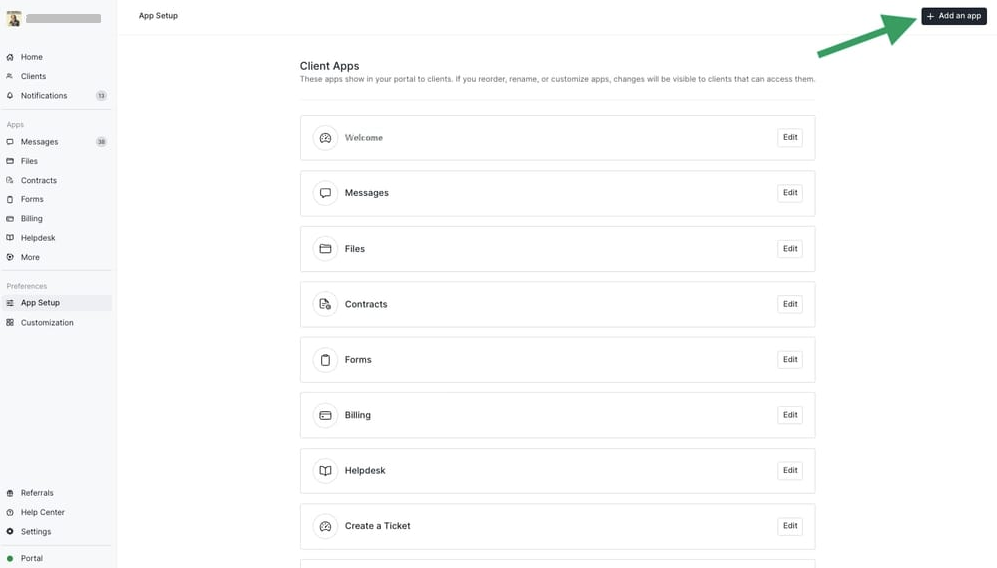
In the left sidebar, click App Setup, then select + Add an app to open the App Directory.
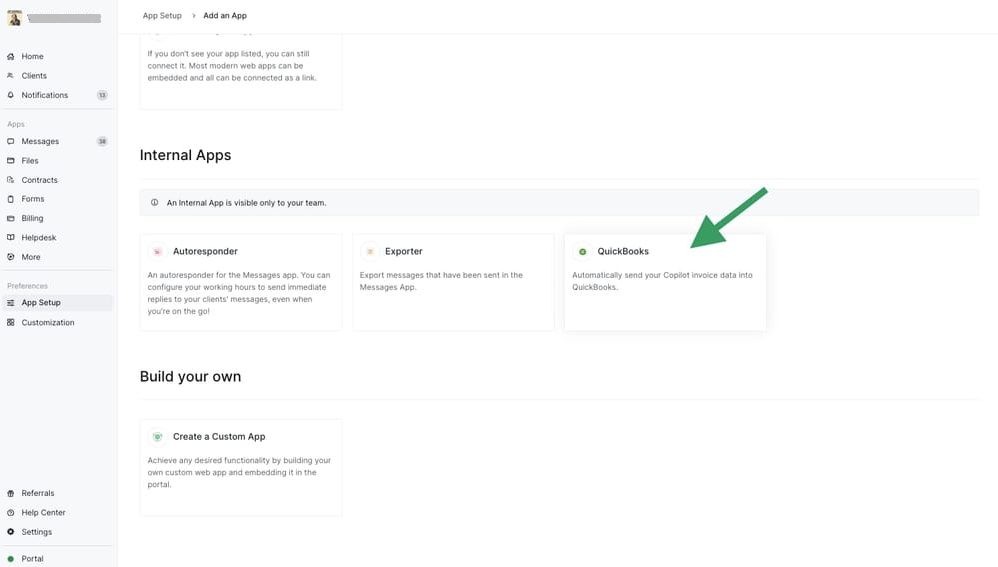
Scroll to the Internal Apps section, select QuickBooks, and click Install.
After installing the app, click Connect to QuickBooks at the top of the page. Sign in with your Intuit admin account and approve the connection request when prompted.
You’ll be redirected back to the QuickBooks app setup screen once the connection is complete.
Step 3: Configure item mapping and invoice settings
On the QuickBooks app setup screen, review your item mapping and invoice settings before enabling the integration. If you have existing QuickBooks items you charge for but are new to Assembly, you’ll need to create corresponding services in Assembly that match the items you charge for in QuickBooks.
This is where you decide how Assembly services sync to QuickBooks and adjust invoice options based on how you bill clients. If you want more details on each configuration option, our QuickBooks integration guide covers the full setup.
When you’re ready, click Enable App to activate the integration. You’ll see a confirmation once the sync goes live.
Important: This integration works as a one-way sync from Assembly to QuickBooks Online. Only invoices created after enabling the app will sync. Historical invoices and invoices created directly in QBO won’t appear in Assembly.
Step 4: Connect your payout account and create your first invoice
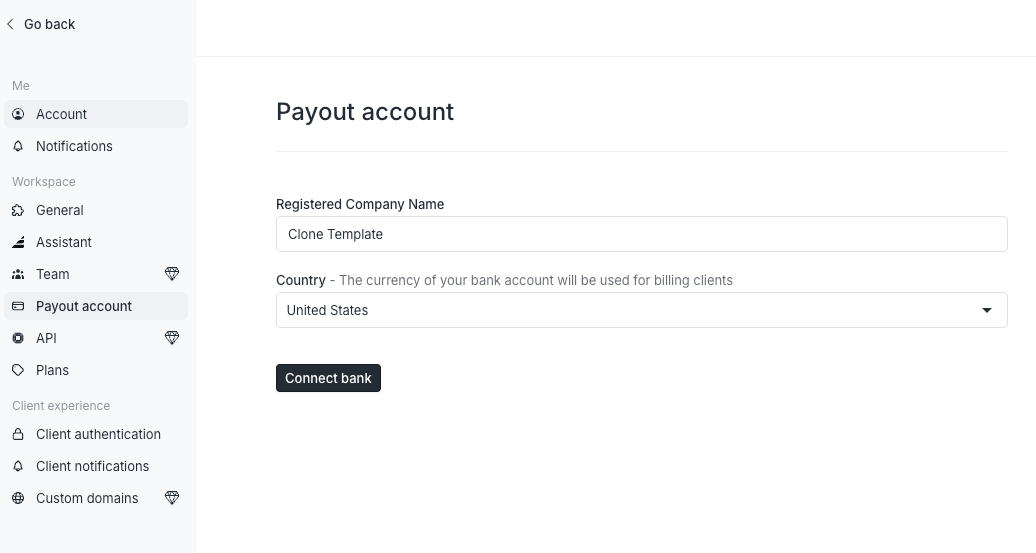
Before creating an invoice, connect your payout account. Go to Settings > Payout account, enter your company details, select your country, and click Connect bank.
Once your payout account is active, go to Payments > Invoices and click Create invoice.
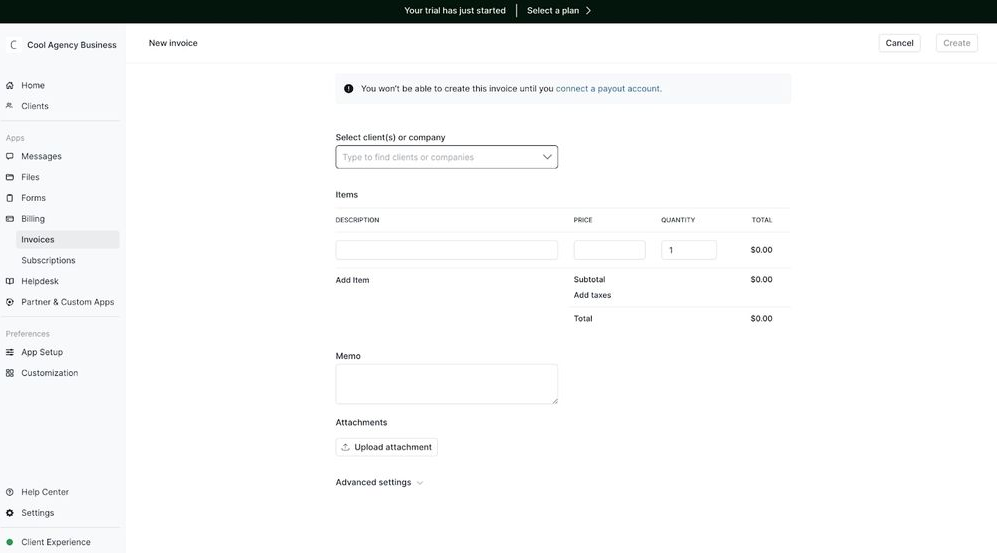
Select your client, add your services, and review the totals. Once you create the invoice, it syncs to QuickBooks automatically since the integration is already enabled.
Tip: Before billing clients, send a test invoice in Assembly to confirm it appears correctly in QBO.
Step 5: Invite your client and test the experience
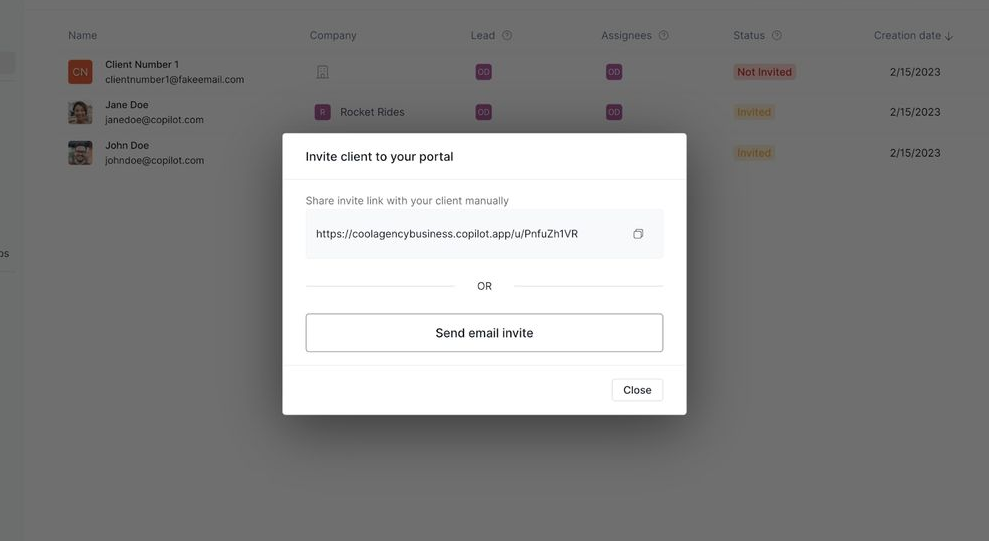
Before sending this to real clients, take a minute to test it yourself. I’ve seen minor billing settings create confusion later, and it’s much easier to fix them now. Log in from the client view and confirm the invoice displays correctly and the payment flow works as expected.
When you’re ready, send the portal invite. Your client will receive an email asking them to create a login and access their dashboard.
Upgrade your QuickBooks client experience with Assembly
A QuickBooks Online customer portal allows clients to view and pay invoices, but it doesn’t provide a fully branded client workspace. There’s no centralized place for documents, structured communication, or ongoing service delivery.
Assembly is a client portal platform designed to build a complete portal experience around QuickBooks, connecting your accounting data with a dedicated client login.
Here’s what you can do with Assembly:
- Connect QuickBooks directly: Sync invoices from Assembly to QuickBooks Online with a one-way integration designed for clean accounting workflows.
- Handle billing in one place: The Payments App lets you create invoices, accept payments, and manage subscriptions directly inside your client portal. Clients see a professional checkout experience under your branding.
- Offer packages and add-ons: The Storefront lets clients purchase your tiered packages or add-on services directly from your portal, making upsells frictionless.
- See the full client record: Notes, files, payments, and messages stay in one organized space. You’ll spend less time switching platforms because the key details are already collected for you.
- Prep faster for meetings: The AI Assistant summarizes recent client activity and communication, helping you walk into calls with a clear picture of what’s been discussed and what’s outstanding.
- Centralize client communication: Our Messages App manages customer questions inside your client portal so your team can track requests, reply, and keep updates connected to the correct client record.
- Cut down on admin: Automate repetitive jobs like reminders, status updates, or follow-up drafts that used to take hours. The Assistant handles the busywork so your team can focus on clients.
Want a client experience that supports your pricing? Start your free Assembly trial today.
Frequently asked questions
Can clients upload documents through a QuickBooks Online customer portal?
No, clients can’t upload documents through a QuickBooks Online customer portal. QuickBooks only supports invoice viewing and online payments. It doesn’t include file-upload or shared document features, so you’ll need a dedicated client portal platform for client file sharing or shared folders.
Can you brand the QuickBooks Online customer portal with your logo and domain?
No, you can’t fully brand a QuickBooks Online customer portal. You can add your company details and logo to invoices, but QuickBooks doesn’t let you create a white-labeled portal with your own domain, customizable dashboard, or branded layout.
Is a QuickBooks Online customer portal secure?
Yes, QuickBooks Online’s invoice and payment flows are secure. Clients access invoices and submit payments through encrypted, Intuit-hosted links. QuickBooks uses industry-standard encryption, authentication, and compliance safeguards, even though it doesn’t provide a traditional client portal dashboard.
Your clients deserve better.
Try for free for 14 days, no credit card required.