
Customer onboarding checklist: 9 steps + free download
Automate your client onboarding with Assembly
Set up time-based automations for welcome messages, intake forms, and invoices, all delivered through a dynamic and branded portal. Try for free!
4.9 rating
A customer onboarding checklist maps every step from the welcome message to the kickoff call. After reviewing onboarding flows across consulting, accounting, and agency firms, here are the 9 steps that matter, plus a free template to get you started.
9-Step customer onboarding checklist
A customer onboarding checklist gives service firms a repeatable process for every new relationship. Here are the 9 steps you can follow to onboard a new customer:
1. Send a welcome message
Send a welcome message within a few hours of the client signing on. Timing matters here because it signals that your firm is organized and attentive before the work even begins.
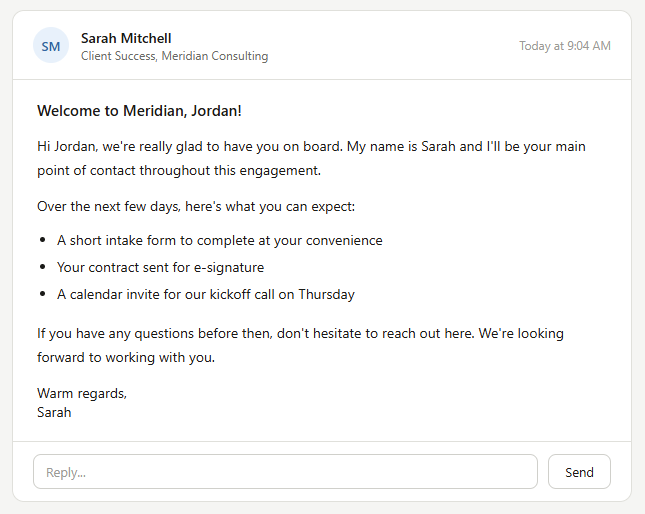
A good welcome message should include a brief intro to your team, a summary of what happens next, and a rough timeline for the first week.
I’d avoid sending the same generic welcome message to every client. Even a small detail like referencing their project, timeline, or goal can make the message feel intentional, and clients often pick up on that right away.
💡Tip: Tools like Assembly let you automate a branded welcome message the moment a client accepts their portal invite, so the first touchpoint goes out without any manual effort on your end.
2. Collect client information with an intake form
Before the work begins, use an intake form to gather everything you need from the client upfront. It's the easiest way to avoid chasing answers across emails in the first week.
The information you collect will depend on your service type. A marketing agency might collect brand guidelines, target audience details, and platform access credentials. An accounting firm might ask for business structure, prior-year returns, and tax IDs.
3. Send the contract and get it signed
Send the contract early so both sides have clear terms before work starts. Cover the scope of work, payment terms, revision limits, and exit conditions in language clear enough for a client to read without legal help.
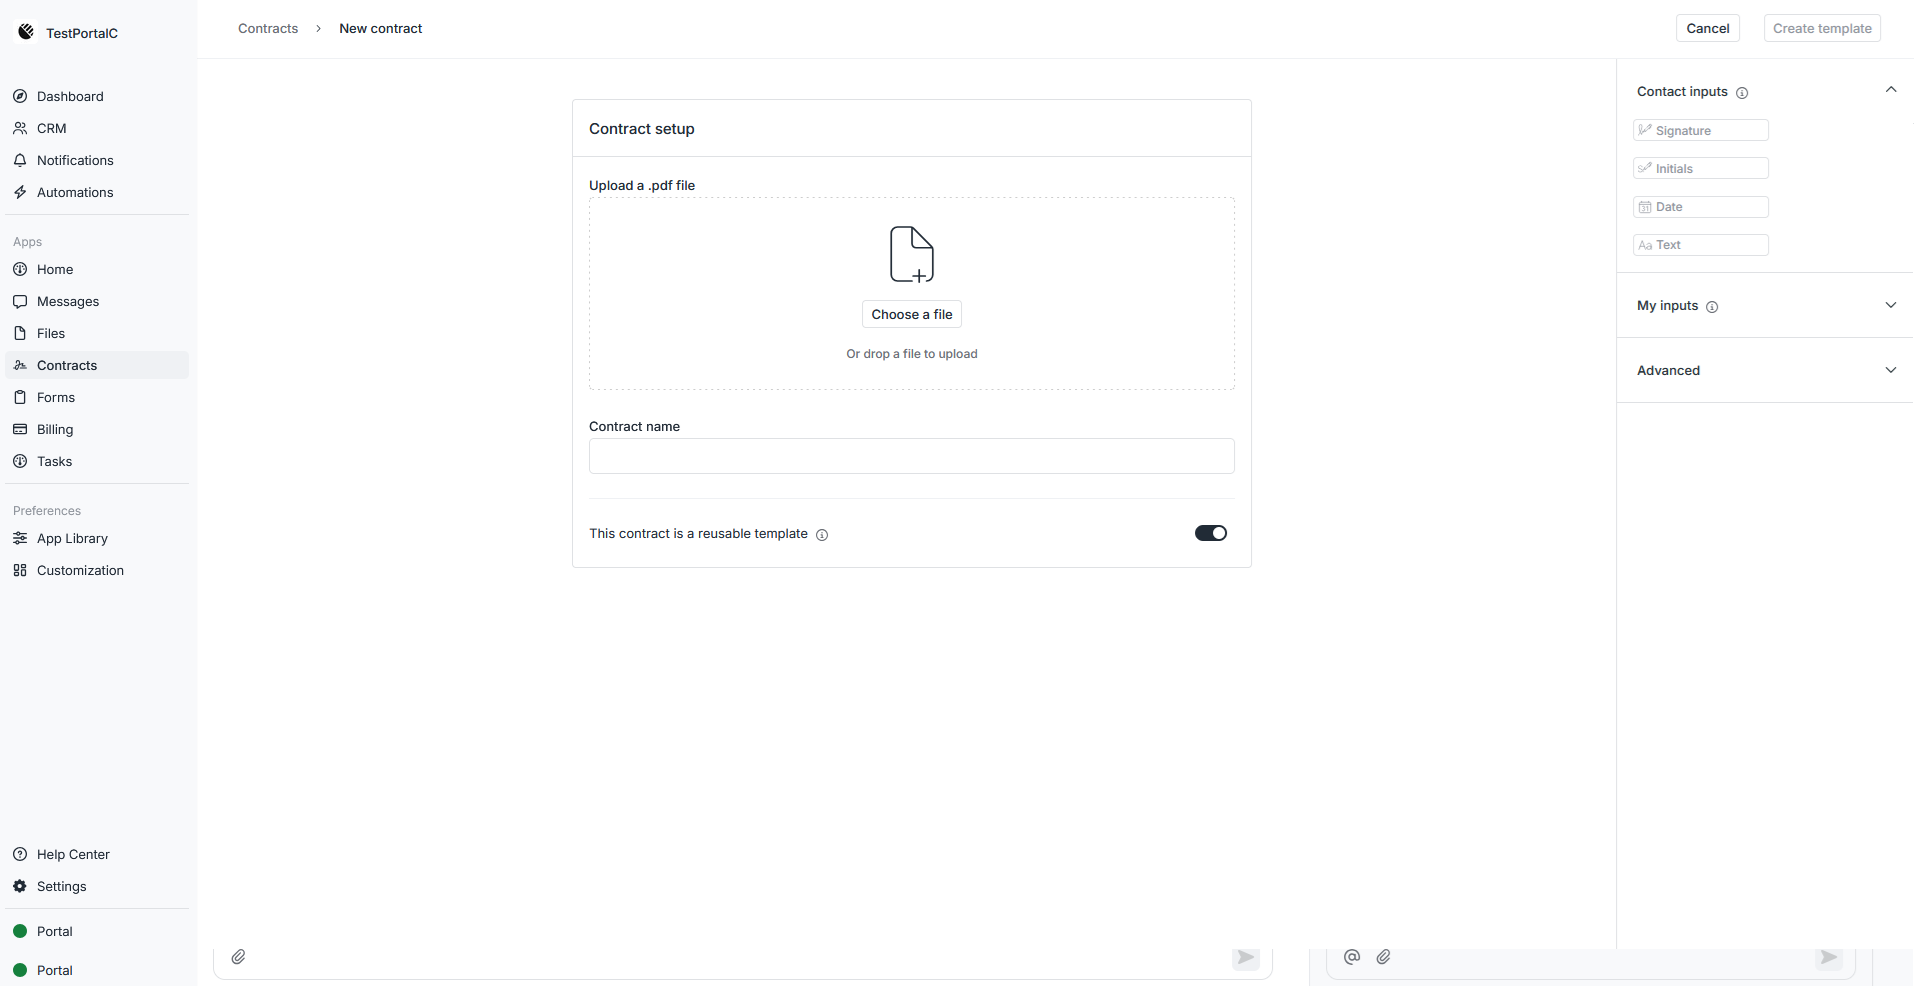
💡Tip: With Assembly, you can upload a contract, collect an e-signature, and track completion all inside the client portal, without a single email attachment.
4. Send the first invoice or payment request
Send the first invoice early so the client knows payment is part of the onboarding process. For most service firms, this means sending a deposit or first installment invoice alongside or shortly after the contract.
Make sure the invoice includes a clear due date, accepted payment methods, and a line-by-line breakdown of what the client is paying for. Vague invoices generate questions, and questions can slow everything down.
5. Set up the client's account and access
Set up the client’s account and permissions before you share anything with them. A clean, focused client environment tends to perform better than an overwhelming one. Start with what's immediately relevant and expand from there.
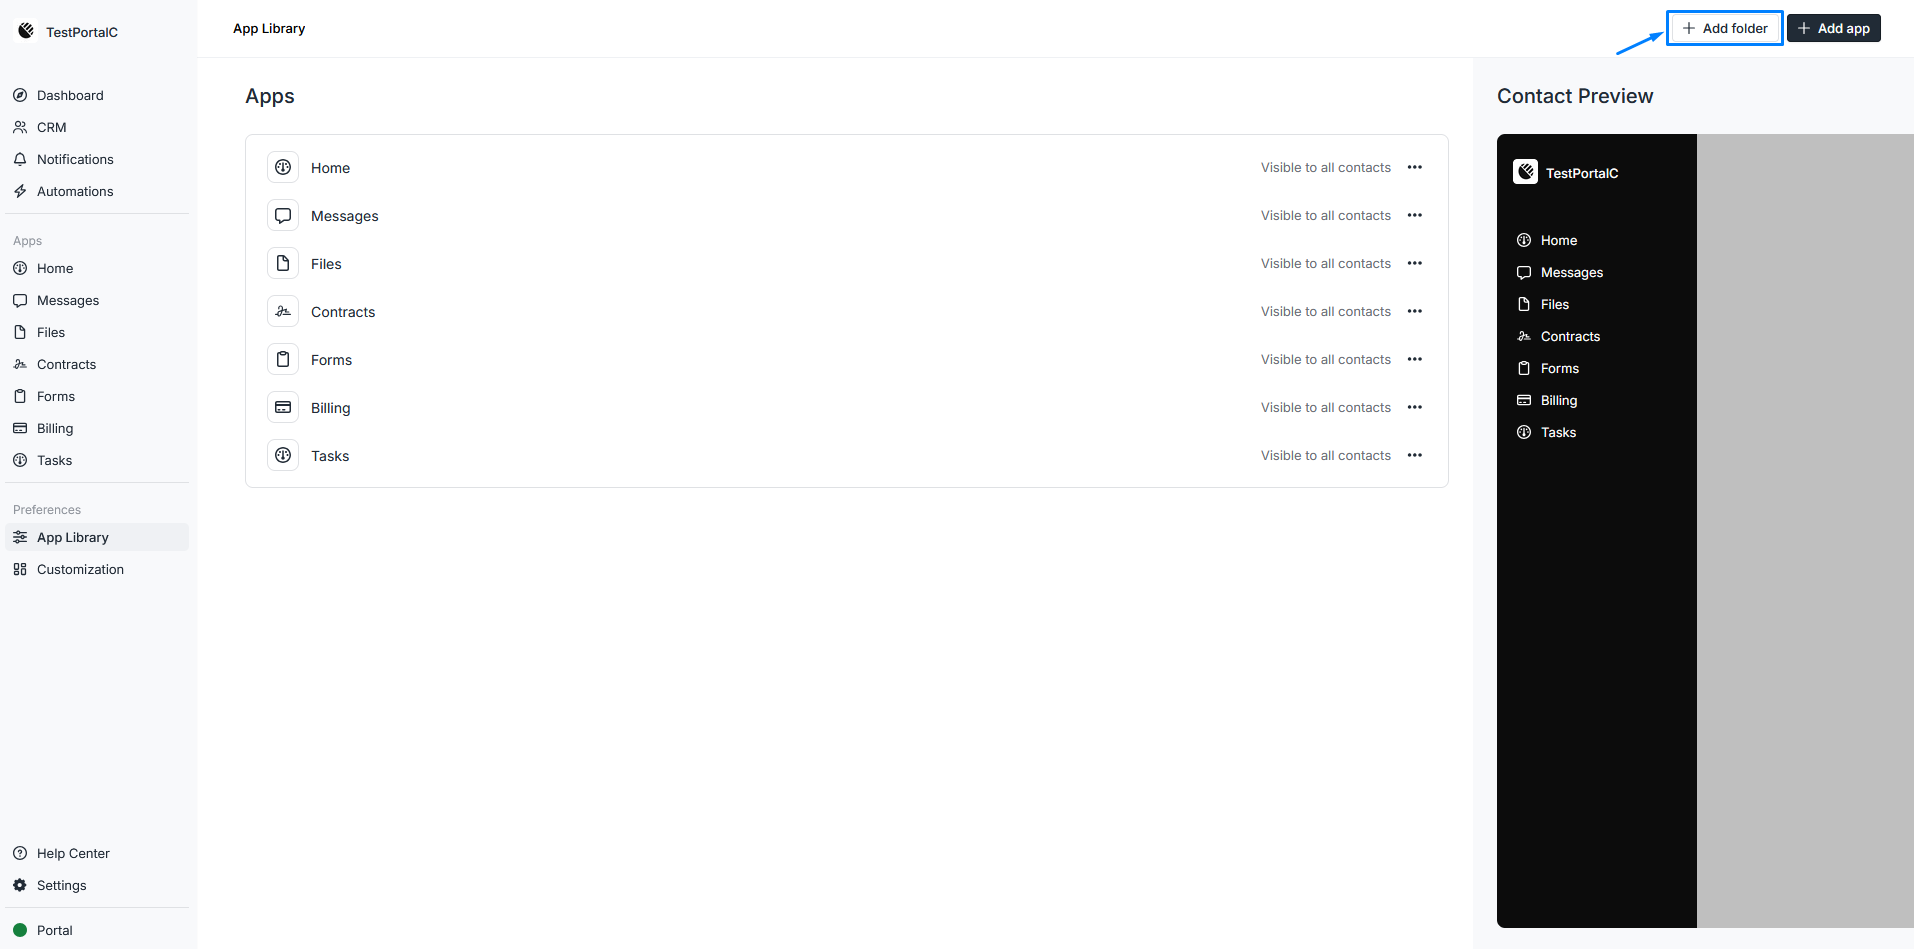
With Assembly's dynamic client homepages, you can use custom field tags to tailor what each client sees based on their service type or onboarding stage. The App Library settings (seen above) lets you control exactly which apps are visible to each client, and App Folders let you group them into an organized sidebar view.
6. Share onboarding materials and resources
Share the key onboarding materials as soon as the client has access to their account. This can include a portal guide, an overview of how your team communicates, key contacts, and resources tied to their project.
Organization matters more than volume here. A pile of links dropped into a message is harder to navigate than a structured resource library grouped by topic. Clients shouldn't have to ask where to find things that should have been handed to them from the start.
💡Tip: Consider building a shared knowledge base for onboarding resources. A well-organized one can cut down on repetitive client questions significantly.
7. Schedule a kickoff call
Schedule the kickoff call within the first 48 hours of onboarding so the client knows the plan, the timeline, and the next steps. Send a calendar invite with a clear agenda attached so the client knows what to expect and can come prepared.
A 45- to 60-minute kickoff call is usually enough to align on goals, walk through the timeline, and give the client space to ask questions. Running long doesn't signal thoroughness. More often, it signals poor preparation.
Send a brief recap after the call with decisions made and next steps confirmed. It takes 10 minutes and often prevents a surprising amount of misalignment down the line.
8. Assign tasks and set expectations
Assign the next tasks right after the kickoff call so both sides know what to do next and who owns each item. Keep tasks specific. For example, a task such as "Upload your brand logo in PNG format to the Files section by Friday" gives a client everything they need to act without asking a follow-up question.
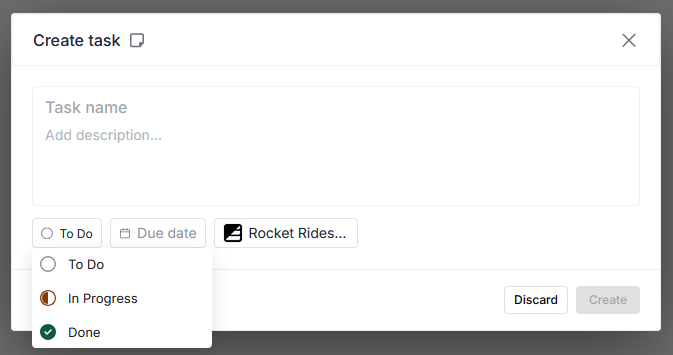
💡Tip: Assembly lets you associate tasks with a client and control what the client can see, so internal notes can stay private while client-facing tasks stay clear.
9. Close onboarding and gather feedback
Close onboarding once the client has what they need and active project work is ready to begin. Mark that transition with a short message to confirm they're fully set up. You can also use that message to outline how ongoing communication works.
Build feedback collection into every onboarding process as a standard step, not a nice-to-have. A 2-to-3-question survey about the onboarding experience takes less than 2 minutes to complete and gives you data to improve the process for the next client.
From what I've seen, clients who are asked for feedback early tend to stay more engaged throughout the project. It's a small ask that signals you're paying attention.
Download the free customer onboarding checklist
Use this checklist to track every onboarding step from welcome message to feedback collection. You can also customize it for your firm and your specific processes and needs.
Get the customer onboarding checklist
Benefits of a customer onboarding checklist
A customer onboarding checklist builds consistency, reduces mistakes, and gives your team a repeatable process you can scale. Here are some benefits you can expect:
- Consistent client experience: Every client gets the same quality of onboarding regardless of who on your team runs it.
- More time on what matters: Your team spends less time figuring out what to do next and more time moving clients forward.
- A clear paper trail: Every step, from the welcome message to the signed contract and completed intake form, gets documented so nothing falls through the cracks.
- A process that scales: As your client base grows, a checklist helps you keep onboarding quality consistent without adding more work to your team’s plate.
- Faster team ramp-up: New team members can start onboarding clients faster without needing constant guidance from senior staff.
Common customer onboarding mistakes to avoid
Poor onboarding usually comes from a few process gaps that repeat across firms. Here are a few common mistakes teams make:
- Sending everything at once: Dropping every resource, form, and document on a client in the first message can overwhelm them before they've found their footing.
- Waiting until the kickoff call to start: Clients who don’t hear from you beforehand often show up unclear on what’s happening and unprepared to move forward.
- Unclear task ownership: Without a clear assignment, both sides can assume the other is handling something, and nothing gets done.
- Letting onboarding drag on: Without a clear endpoint, clients can feel stuck in a permanent getting-started phase and may never fully settle in.
- Skipping the feedback step: Without a feedback loop, the same onboarding gaps repeat with every new client and can often go unnoticed.
Want to automate your onboarding checklist? Try Assembly
If you're building a customer onboarding checklist and want a platform that runs the process under your own brand, Assembly is worth considering.
Assembly is a client portal software tool built on a core CRM. It lets you build a branded client portal under your own domain, with intake forms, contracts, invoicing, messaging, file sharing, dynamic client homepages, and time-based automations all in one place.
Here’s what you can do with Assembly:
- Track client details and activity: Manage client records, communication history, notes, and relationship data in a structured CRM where that context stays accessible no matter where you are in the workspace.
- Dynamic branded portal: Each client logs into a workspace that reflects your brand, with content tailored to their account. You control what they see and keep internal tasks and notes separate from the client view. Group apps into sidebar folders to keep your own workspace organized by function.
- Recurring automations: Set time-based triggers for tasks, messages, and forms so routine accounting work like monthly reminders, document requests, and follow-ups runs on schedule without manual effort.
- Consolidated payments: Manage invoices, subscriptions, payment links, and store transactions from a single payments page, without jumping between separate billing views.
- Keep tasks, messages, and files together: Project tasks, shared files, and client communication all link to the same account, and you control what clients can see from their portal.
- Prep faster for meetings: The AI Assistant summarizes recent client activity and communication, helping you walk into calls with a clear picture of what’s been discussed and what’s outstanding.
- Cut down on admin: Set recurring automations for reminders, status updates, forms, and follow-ups so client work keeps moving with minimal manual effort.
Ready to deliver an onboarding and client experience that you can adapt to each relationship? Start your free Assembly trial today.
Frequently asked questions
What is a customer onboarding checklist?
A customer onboarding checklist is a structured list of steps that guides new clients from a signed contract to fully set up and actively working with your business. It usually covers welcome messages, intake forms, contracts, invoicing, account access, and a kickoff call. Following a repeatable checklist helps keep your process consistent and reduces the chance of missing a step.
Who is responsible for customer onboarding?
Customer onboarding is usually handled by the person who owns the client relationship at your firm, whether that’s an account manager, a customer success lead, or the business owner. In smaller service firms, one person often handles the entire process. For larger teams, responsibilities can be split, but one person should still own the overall process.
How do you measure the success of customer onboarding?
You can measure customer onboarding success by tracking how quickly clients complete each step and how long it takes to reach the kickoff call. Client feedback at the end of onboarding is another strong signal, especially when it shows where clients get stuck or drop off.
Your clients deserve better.
Try for free for 14 days, no credit card required.